Now that you’ve taken a look at how Y-seams are constructed, it’s time to practice a few so that you can use them in a quilt with confidence! Learning this technique opens up a lot of designs and offers up a lovely clean finish.
When I was teaching myself this technique, I found lots of blogs and tutorials showing how to use Y-seams in a quilt, but very little about practicing them. The few blog posts about practicing them involved templates, and all of that just seemed too complicated and fussy for practice. My printer ink seems to be perpetually dried up, and on top of that, the quilt didn’t even have templates – why should I need them to practice?!
Spoiler alert – You don’t!
I figured out a way to use scraps to quickly and easily create the pieces and practice your Y-seams.
Creating the pieces
-
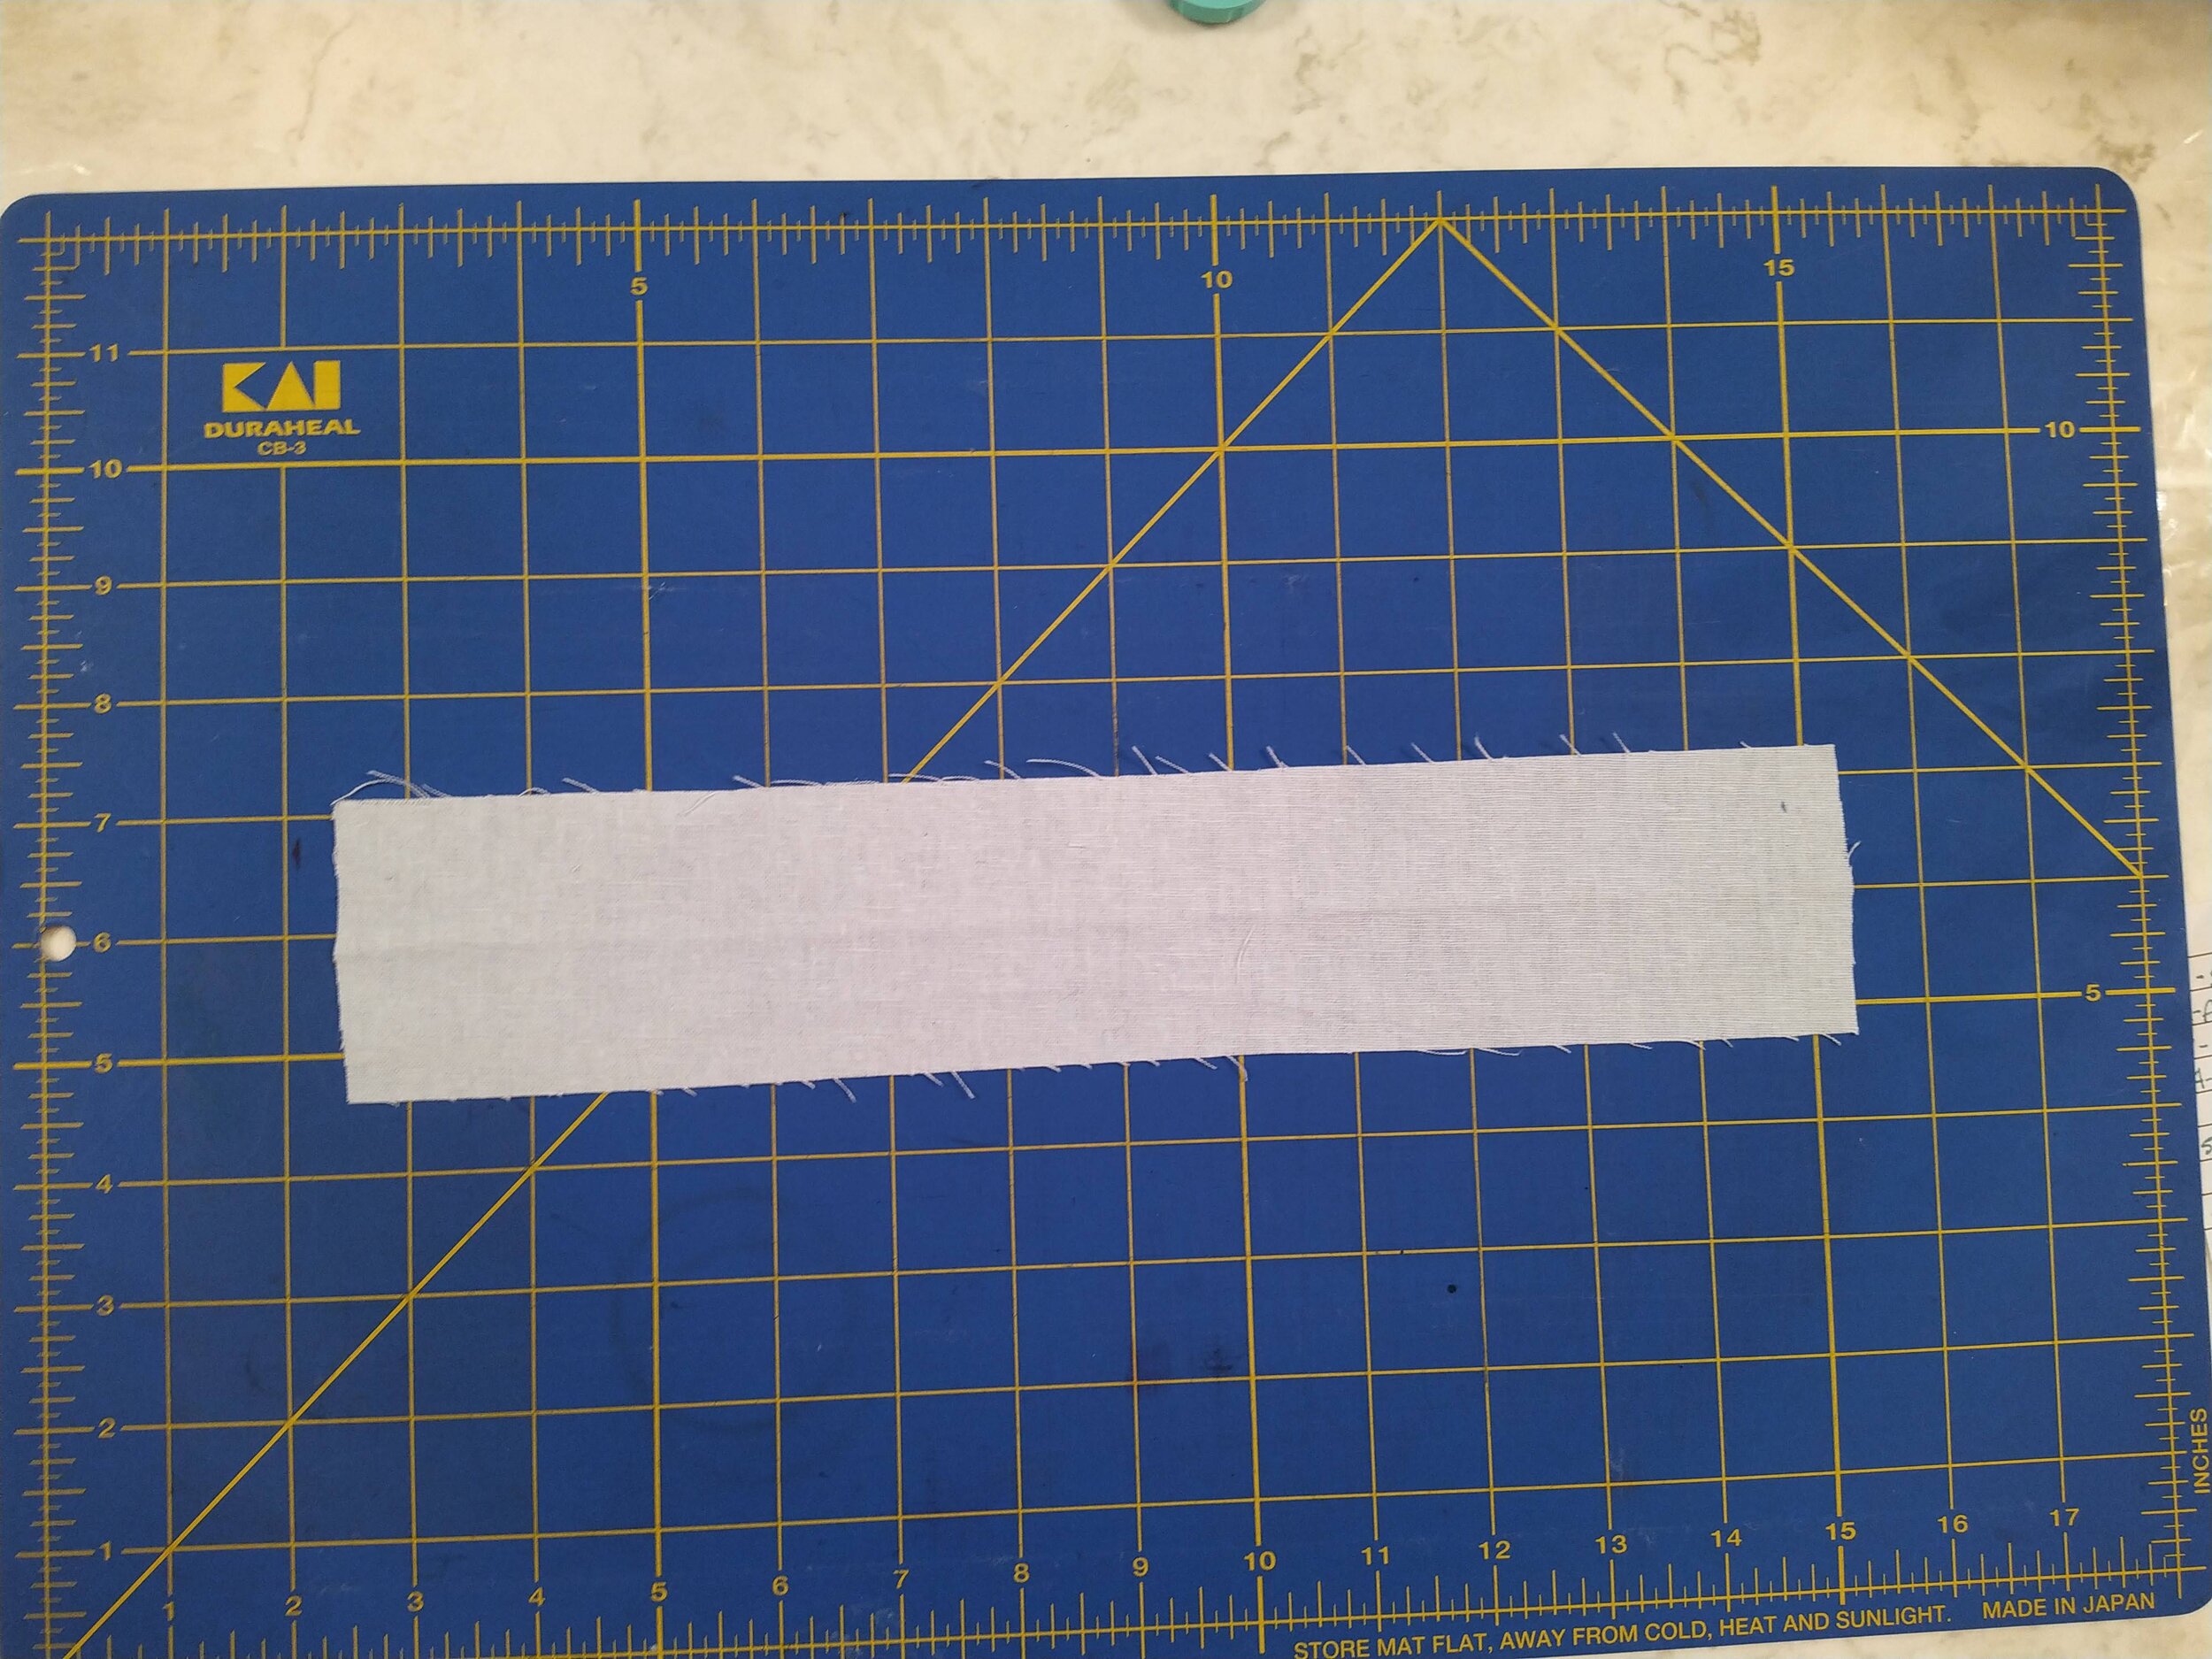
Find some scraps! A strip will work best – a leftover bit of 2.5” binding would be perfect. The fabric should be about 8” long at least. Fold the strip in half.

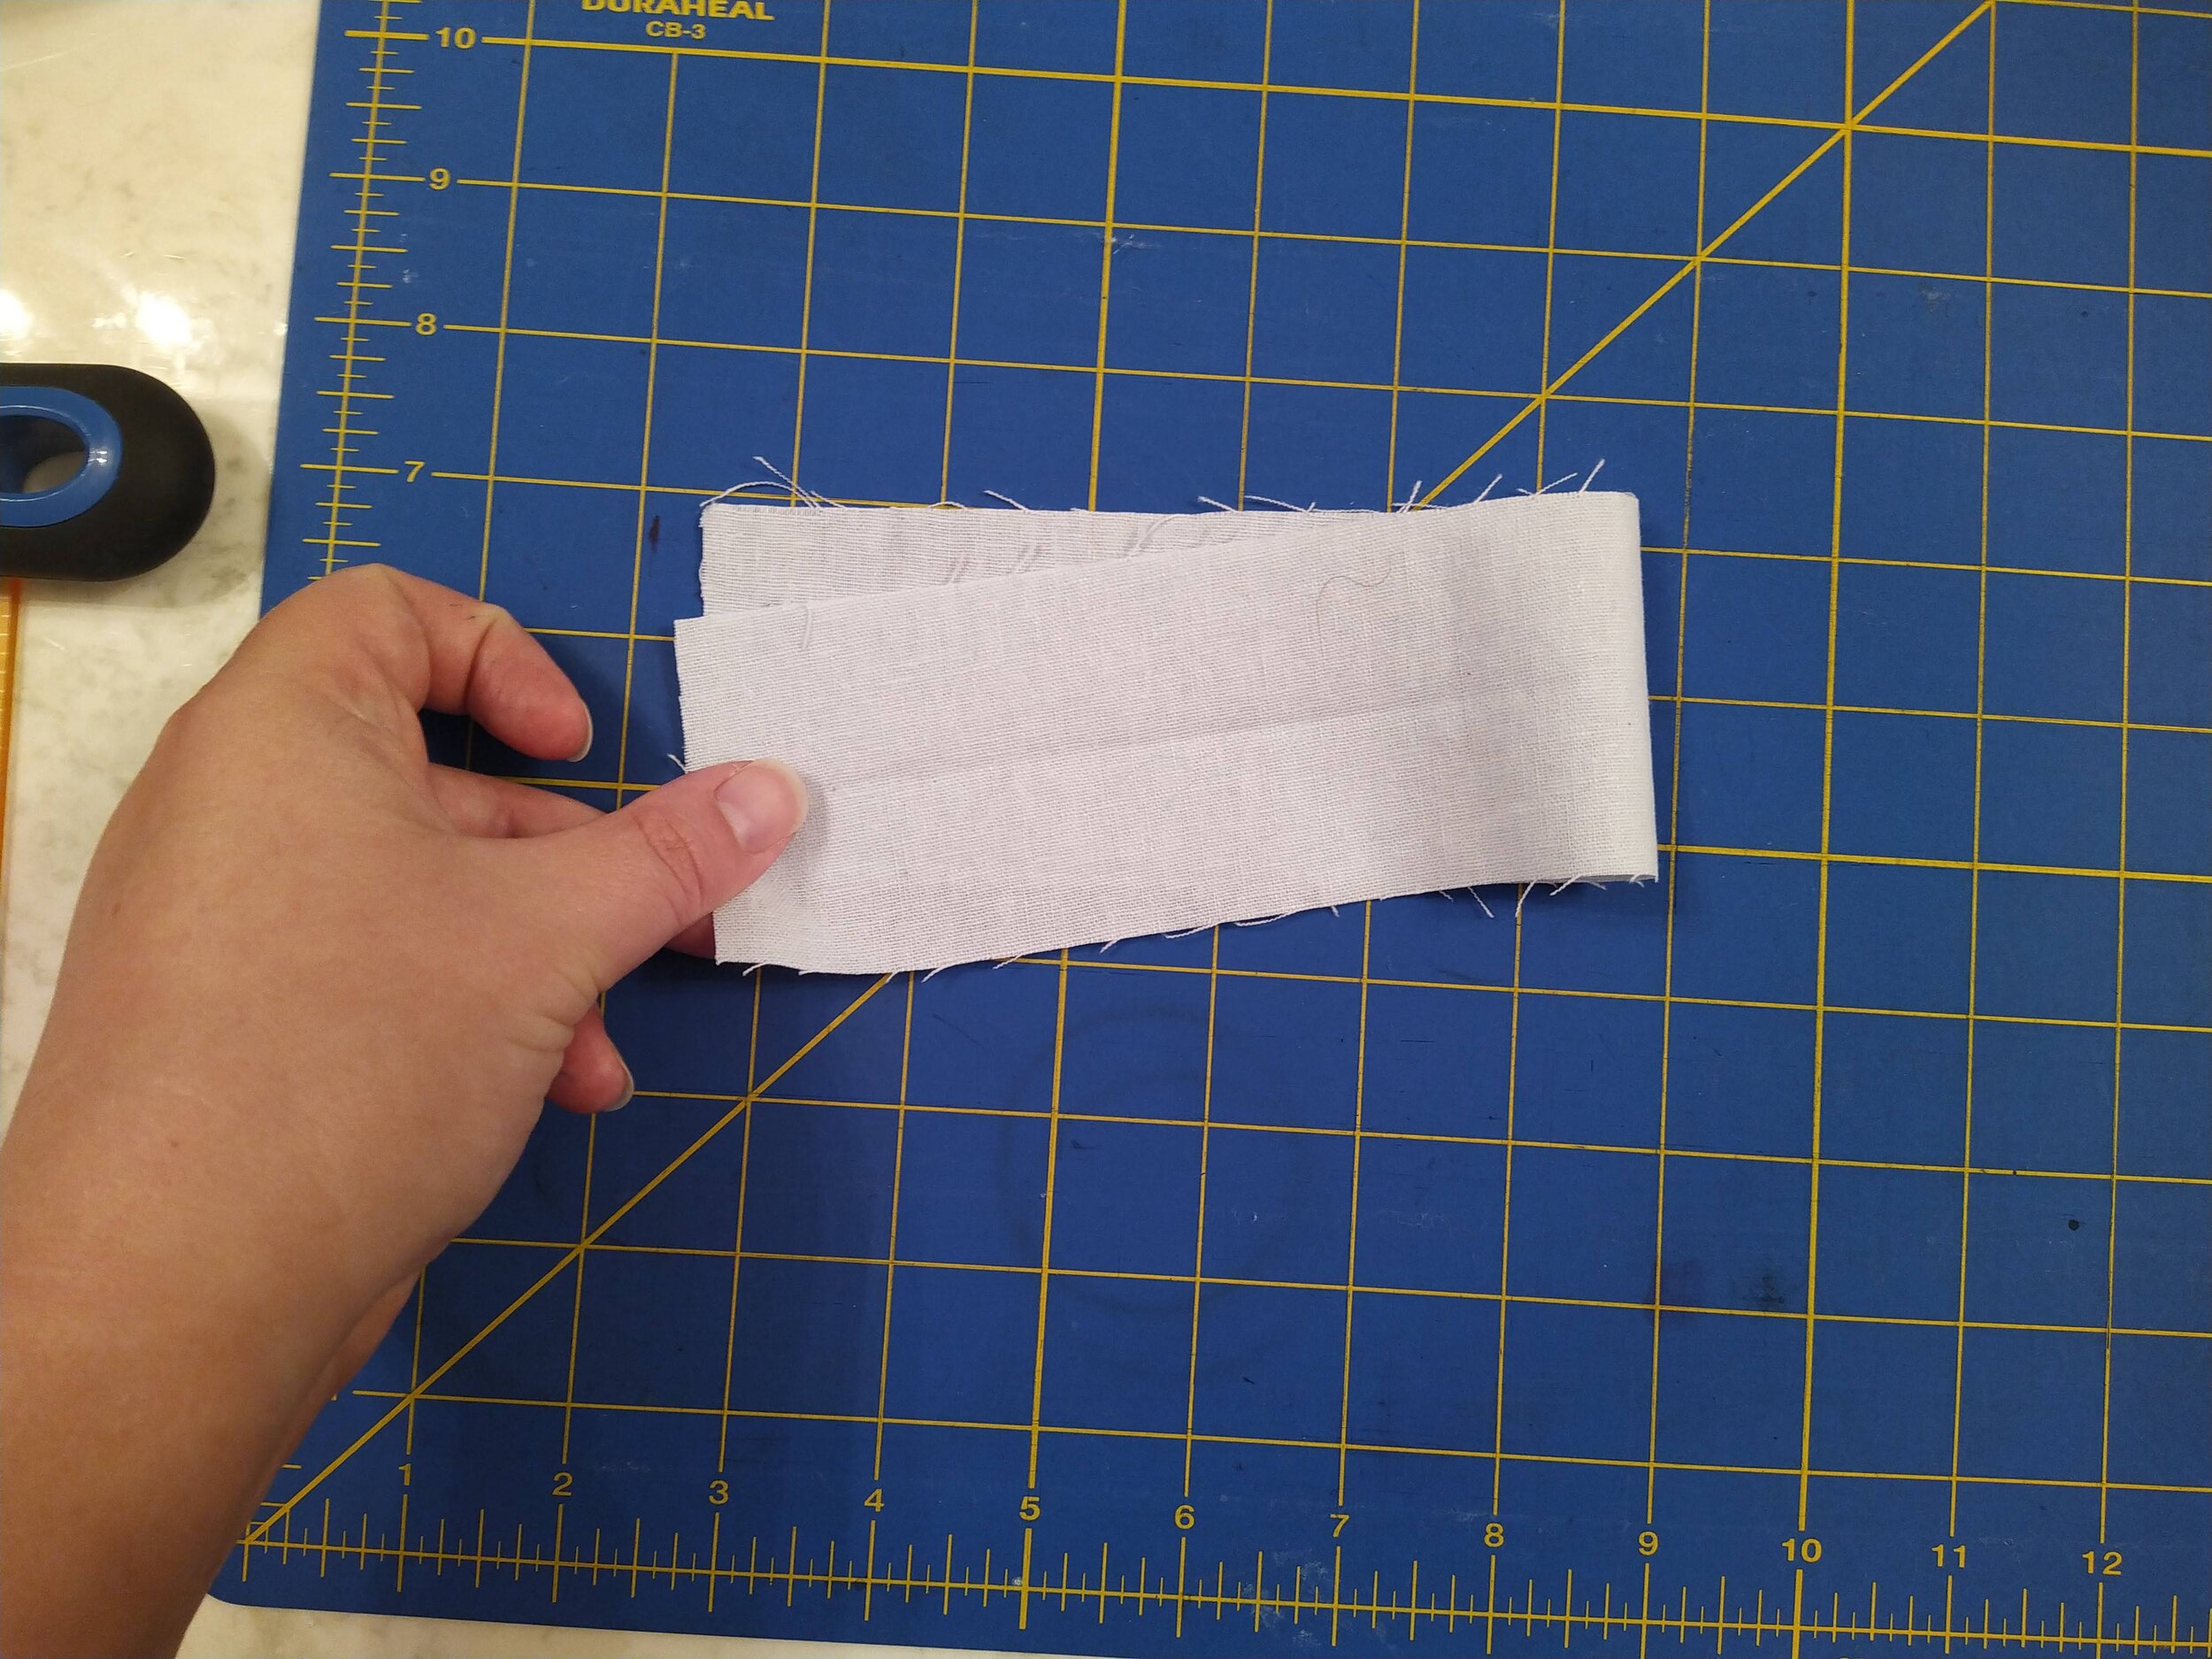
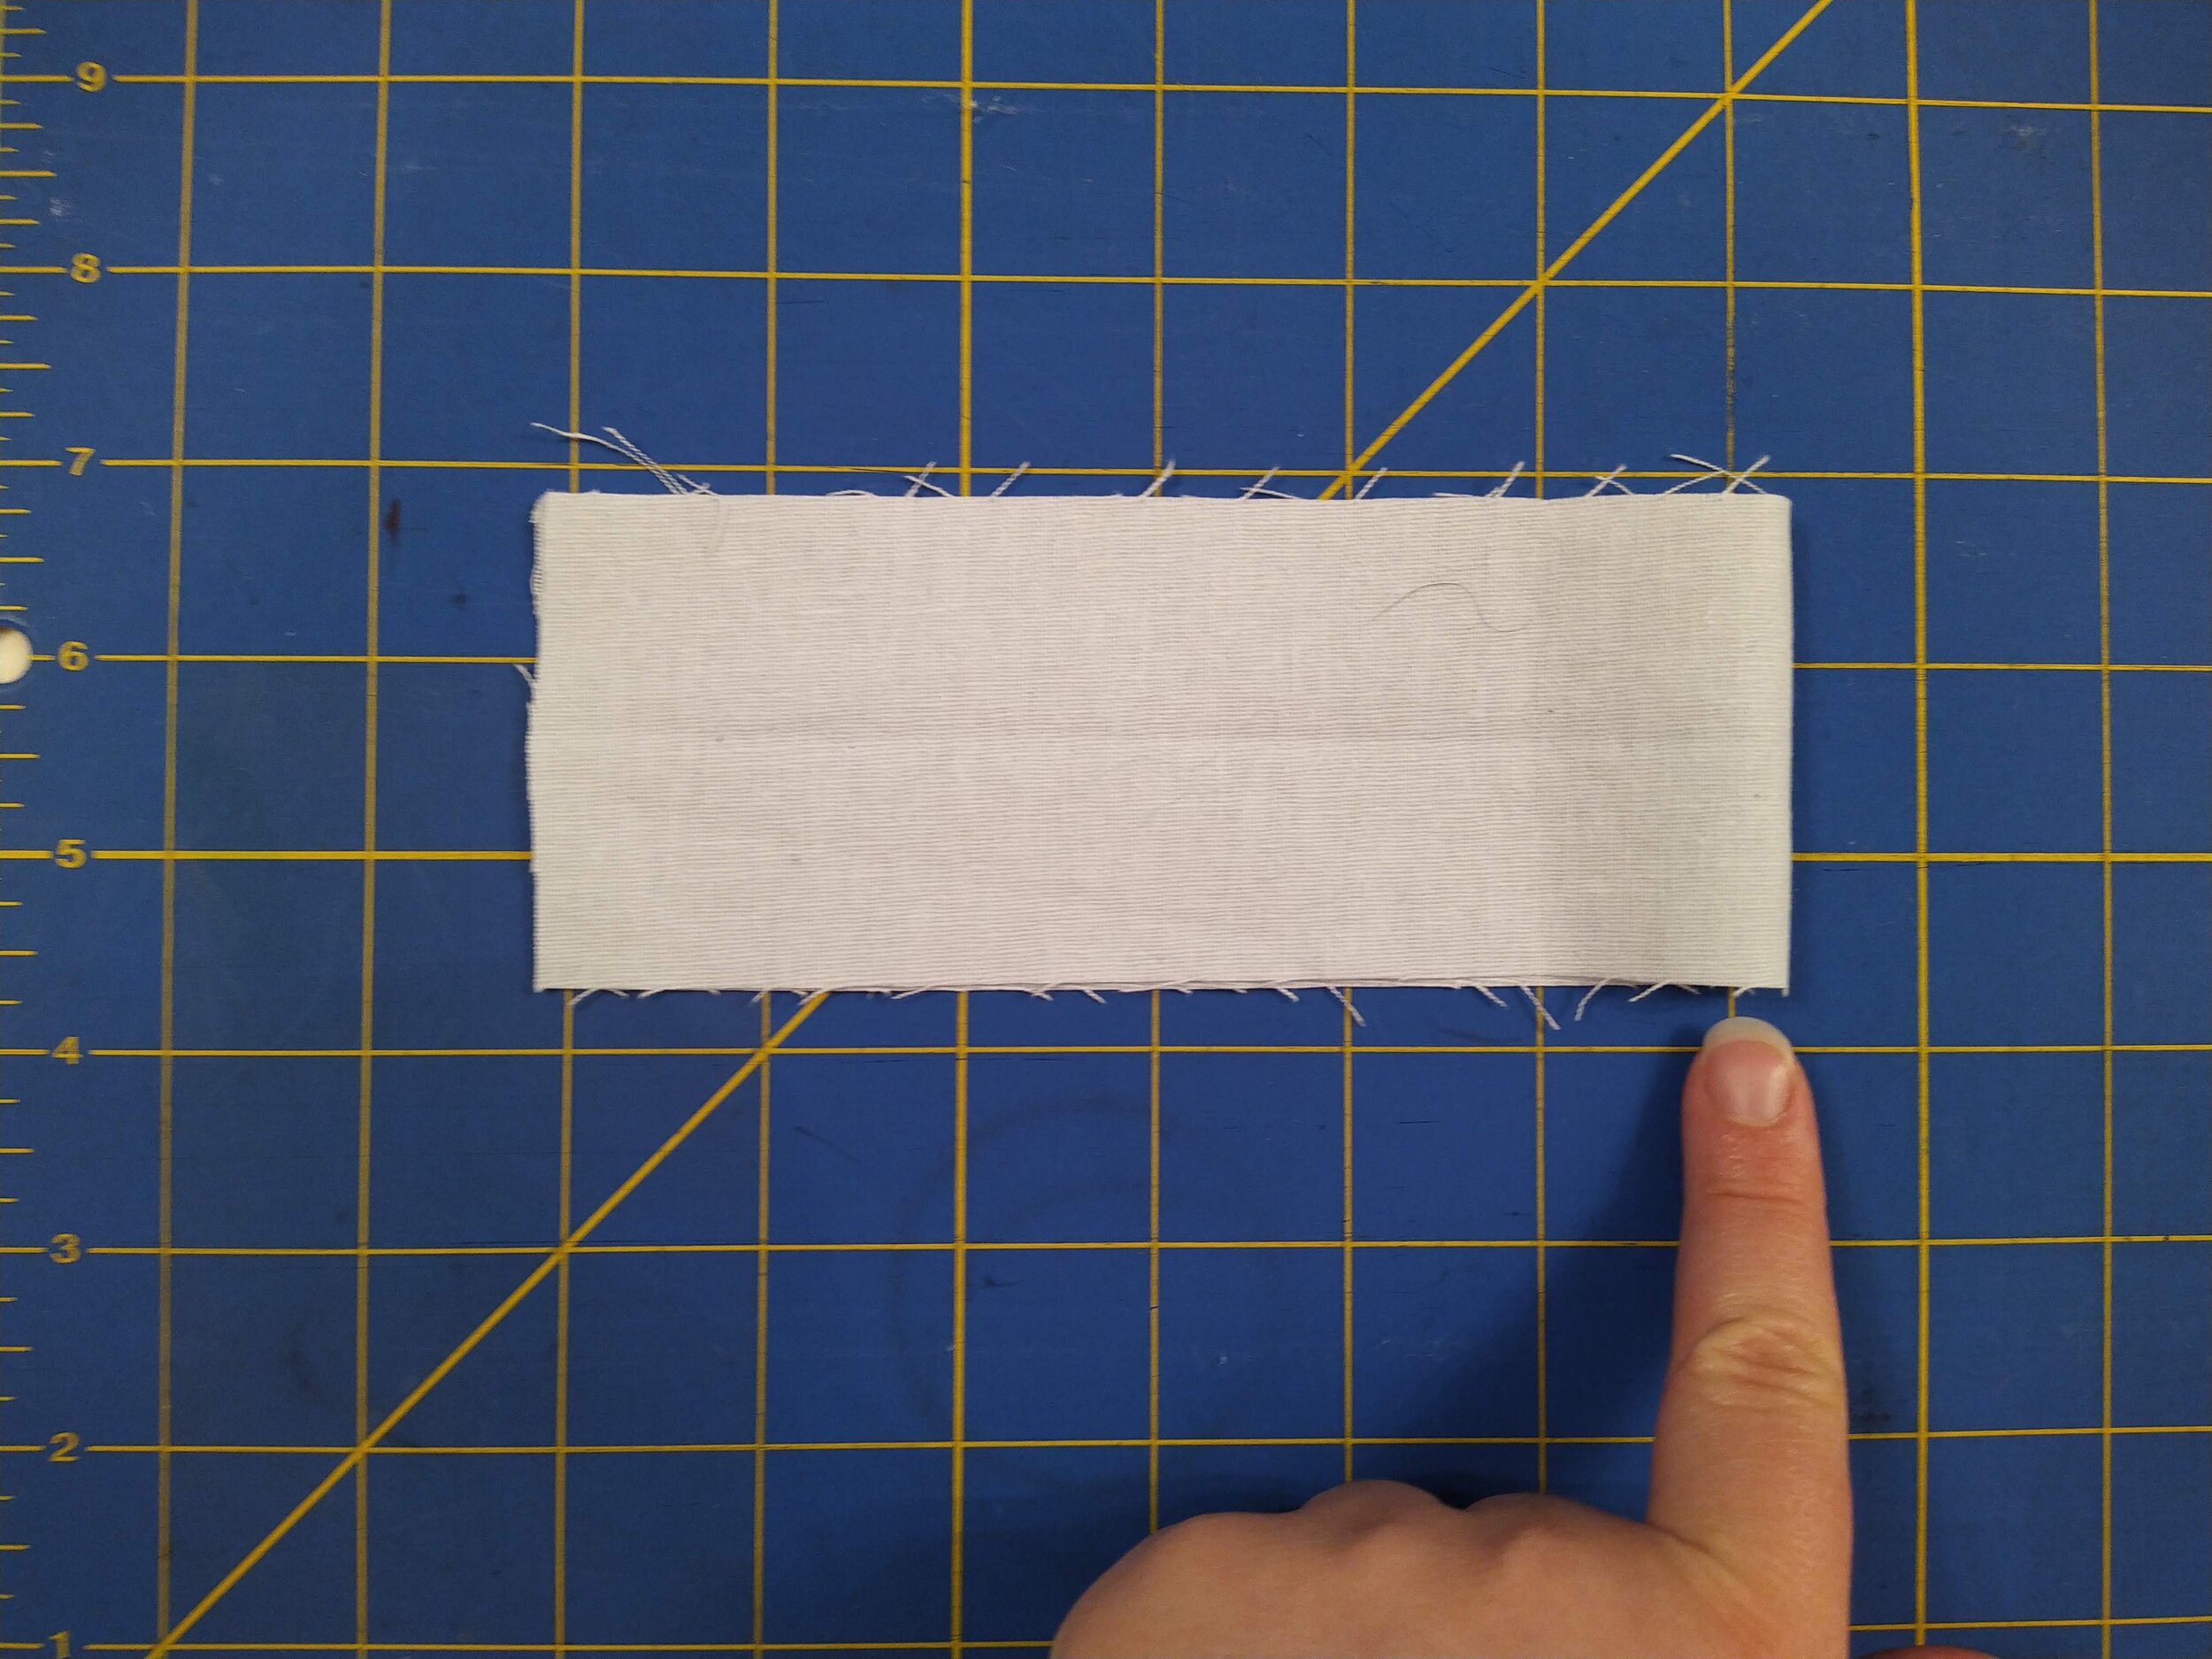
2. Using a ruler or lines on your cutting mat, cut at a 45 degree angle from the corner of the fold. You should have one triangle and two trapezoids.

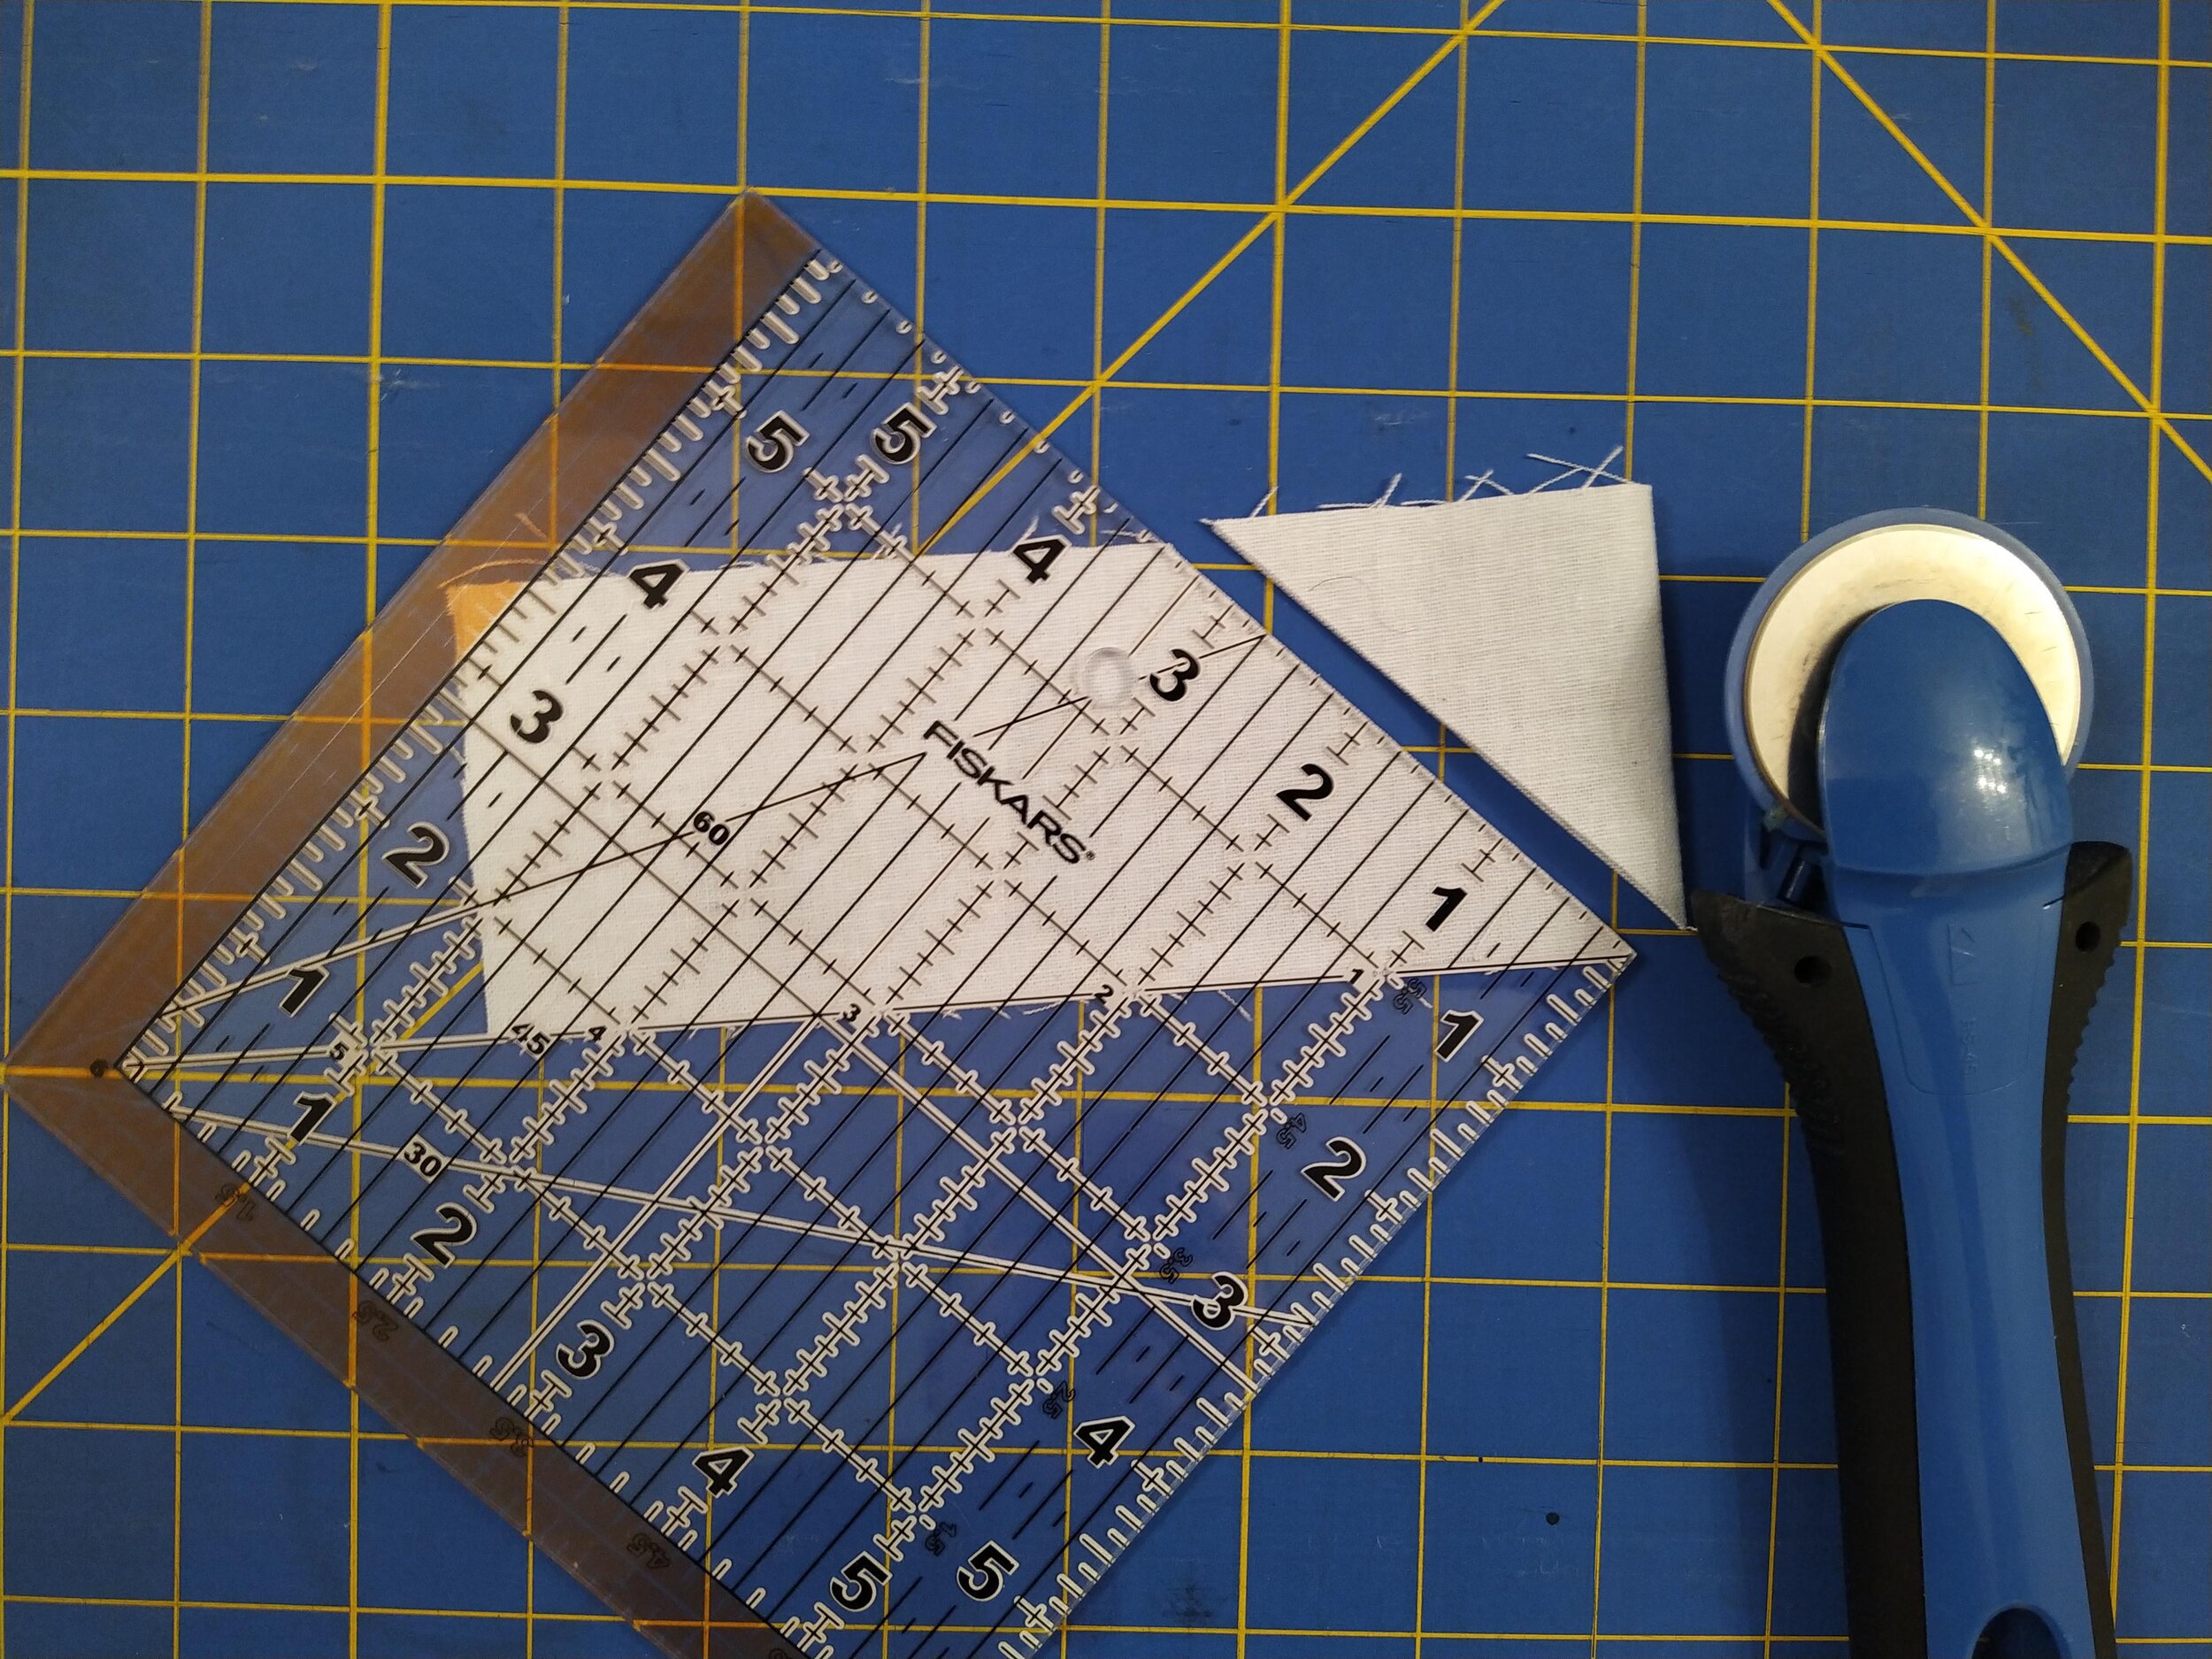

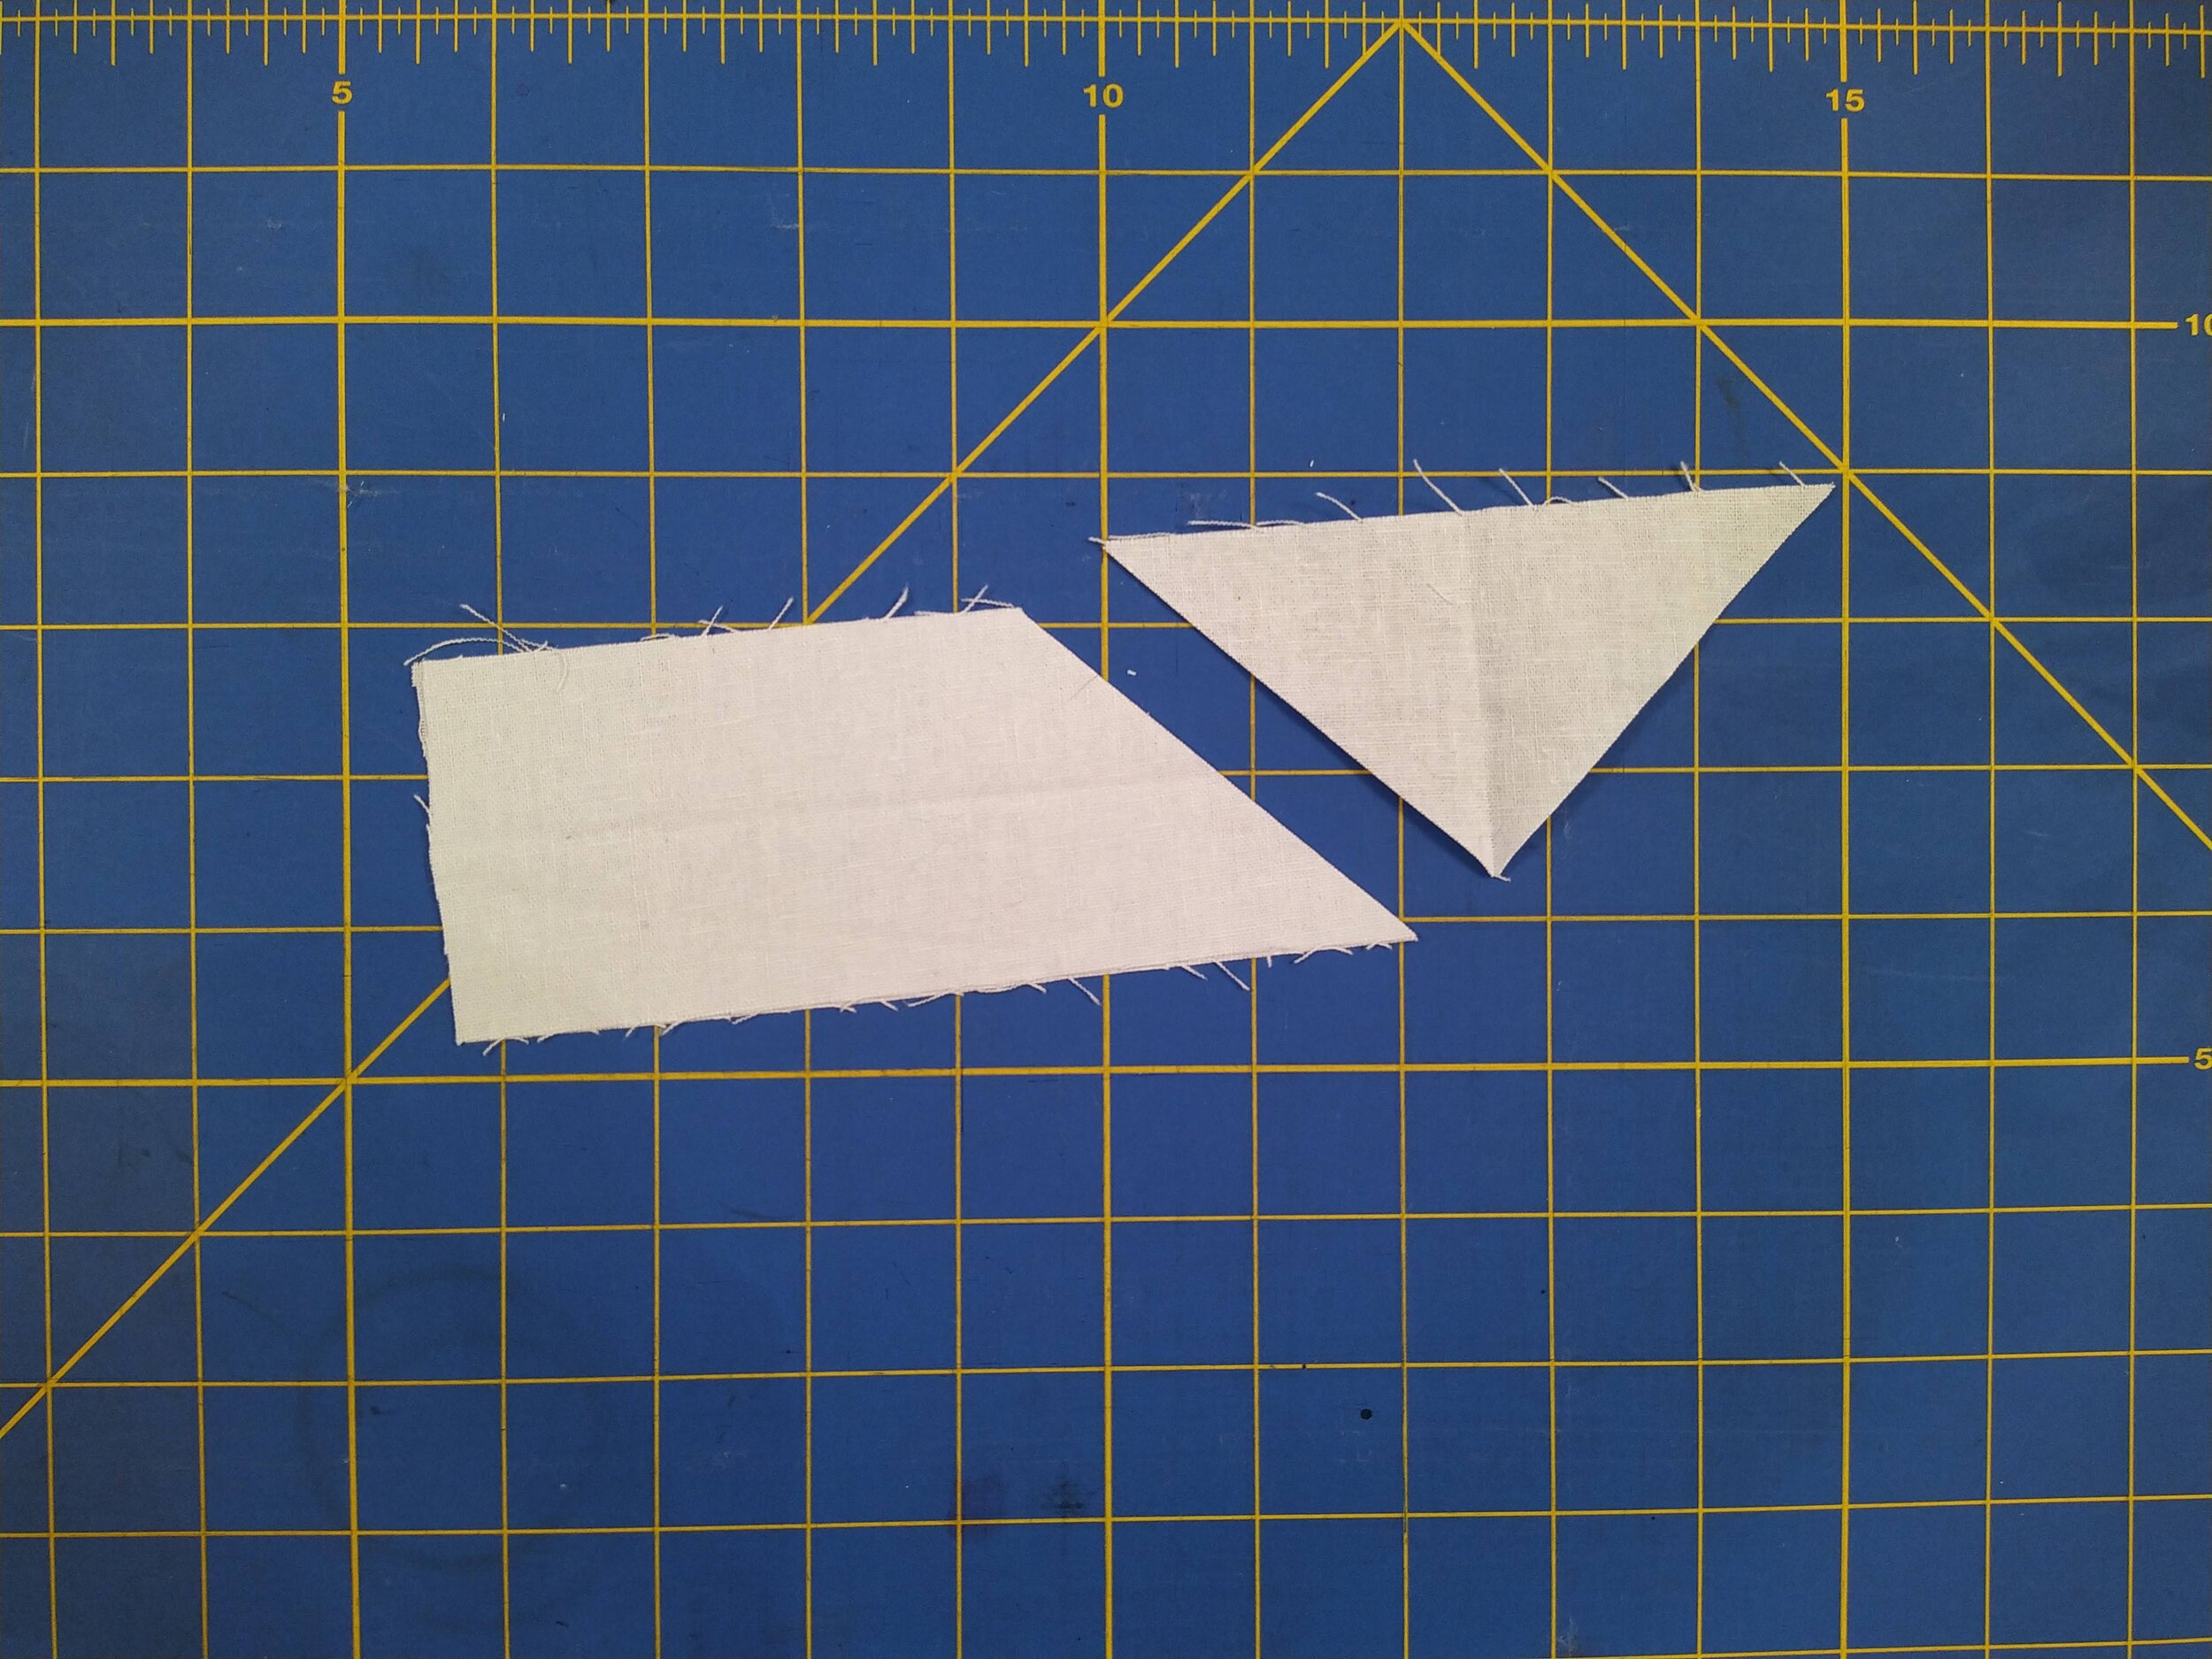
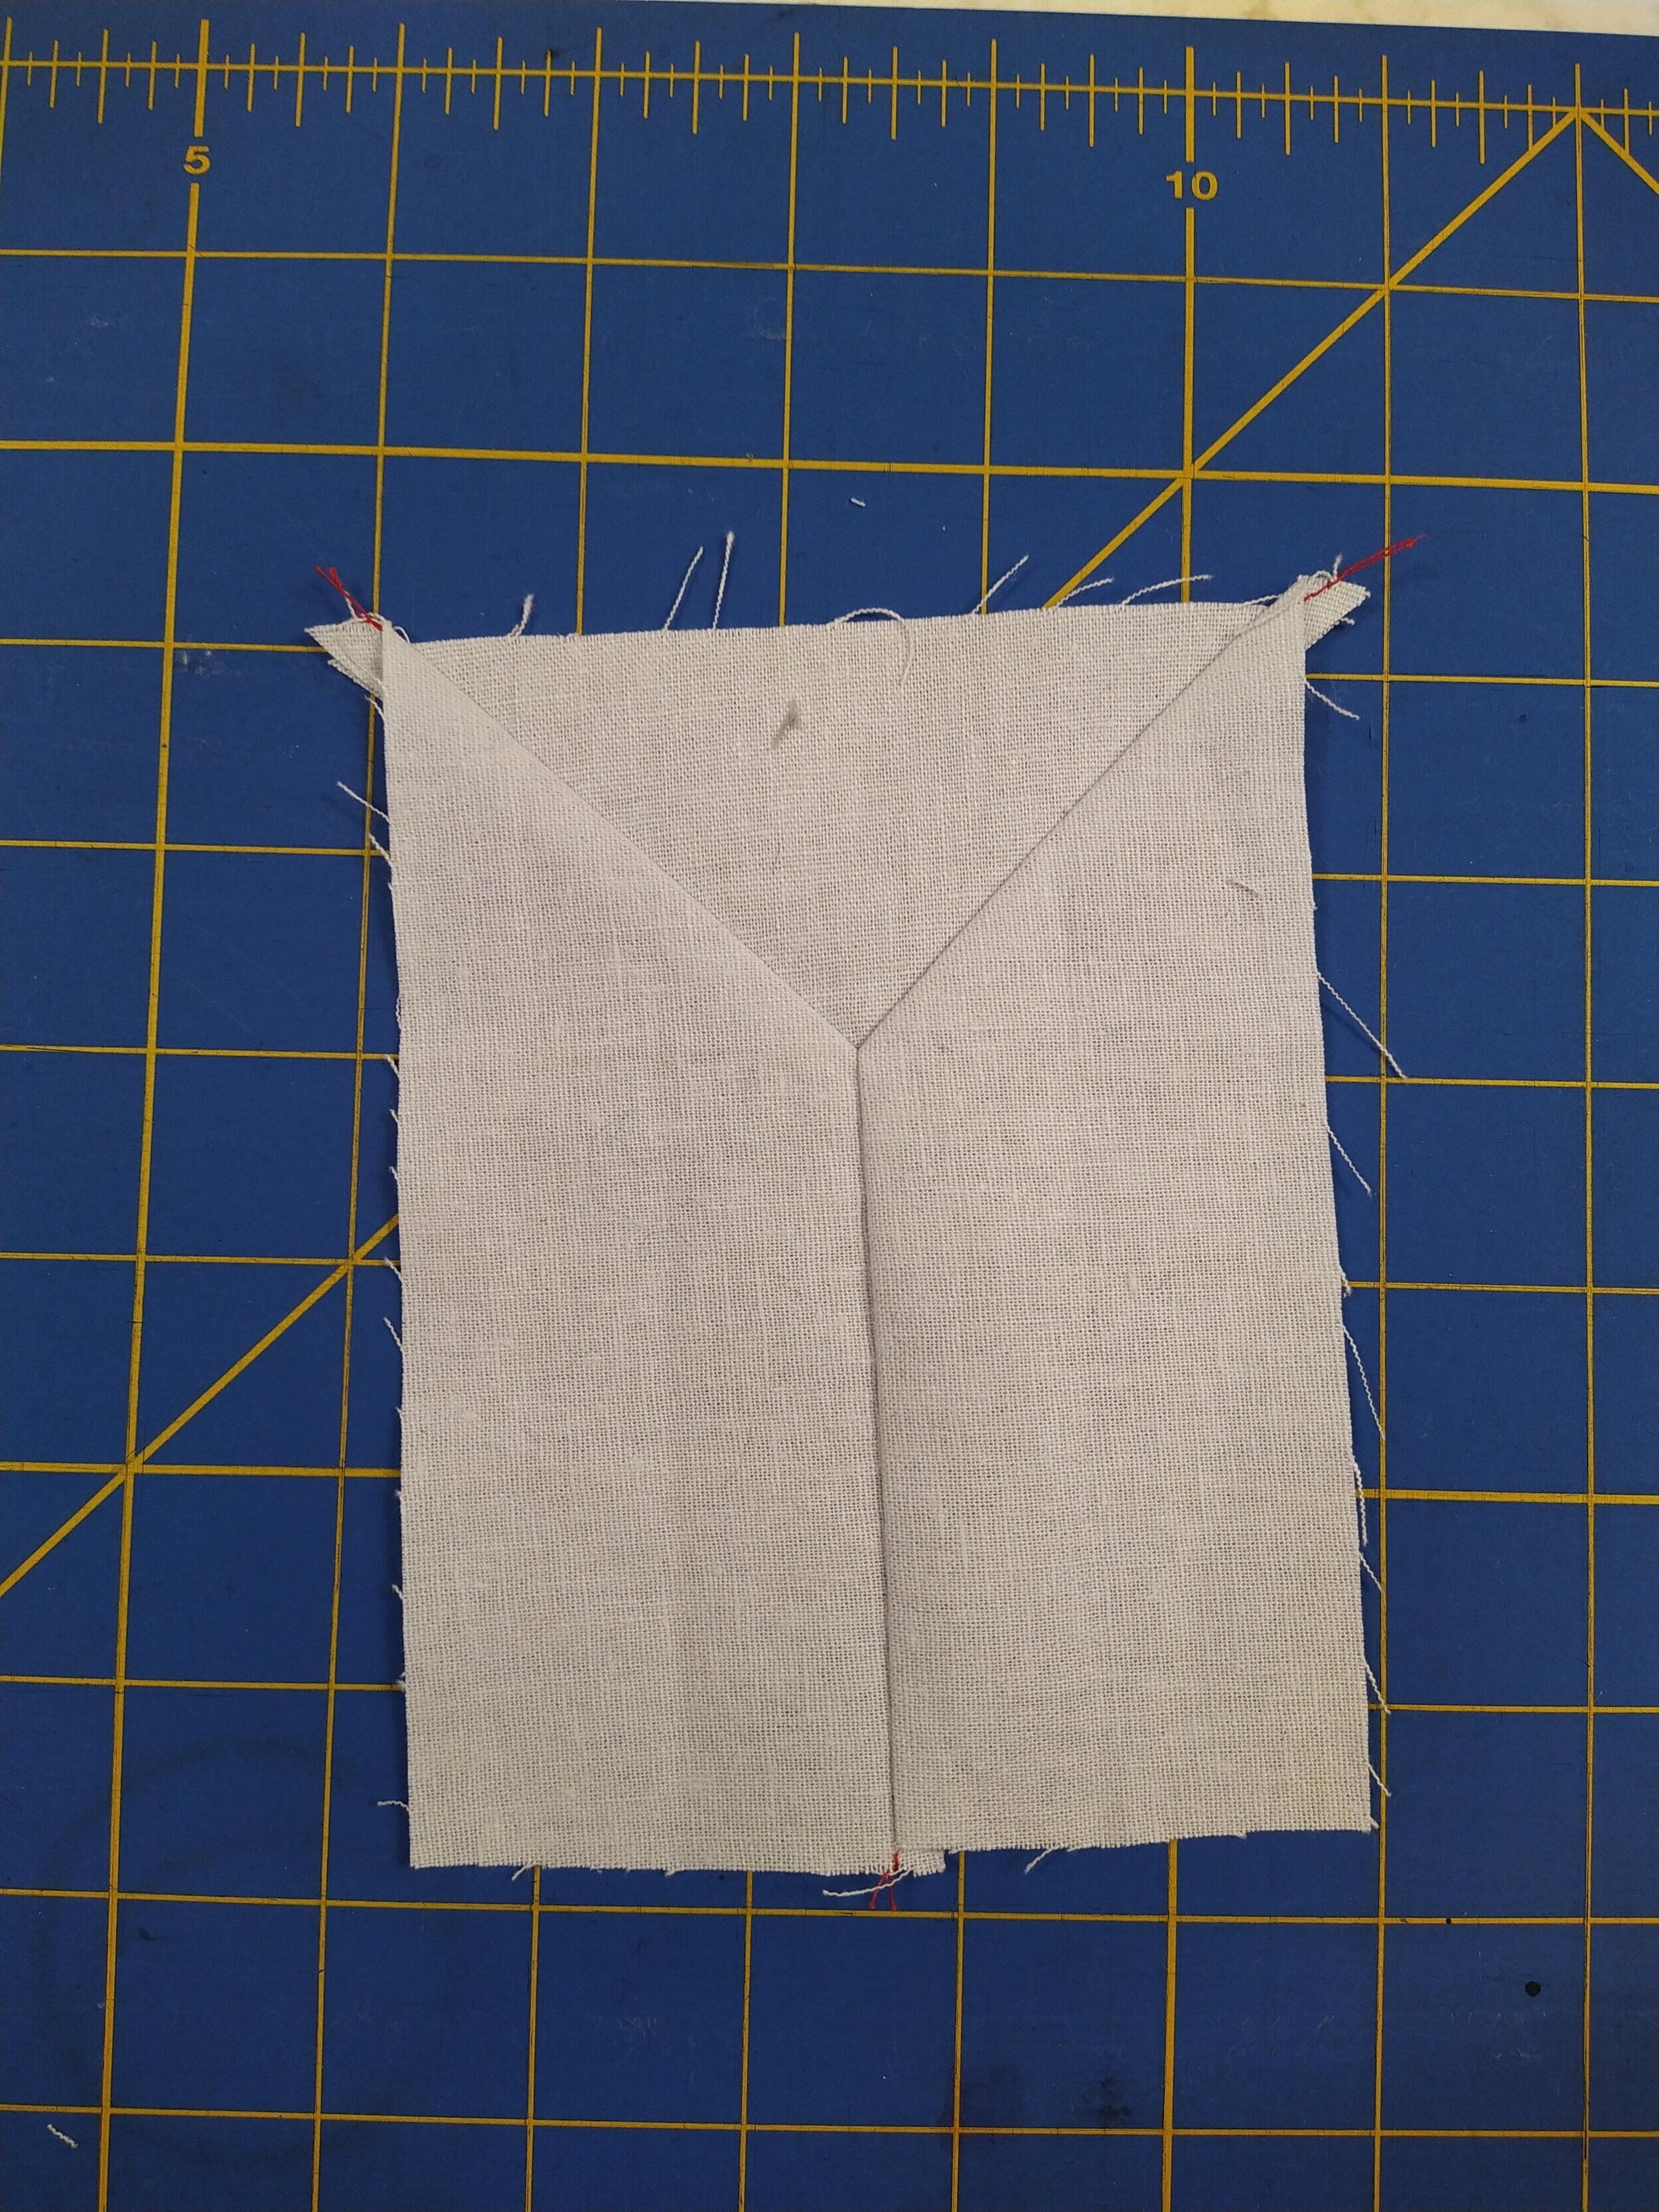
3. The two trapezoidal pieces come together to make a Y shape, and the triangle will fill it.


Sewing Y-seams
Of course , you can use use any method that suits you with the pieces you created, but here’s the method I’ve been using to make my Y-seams.
-
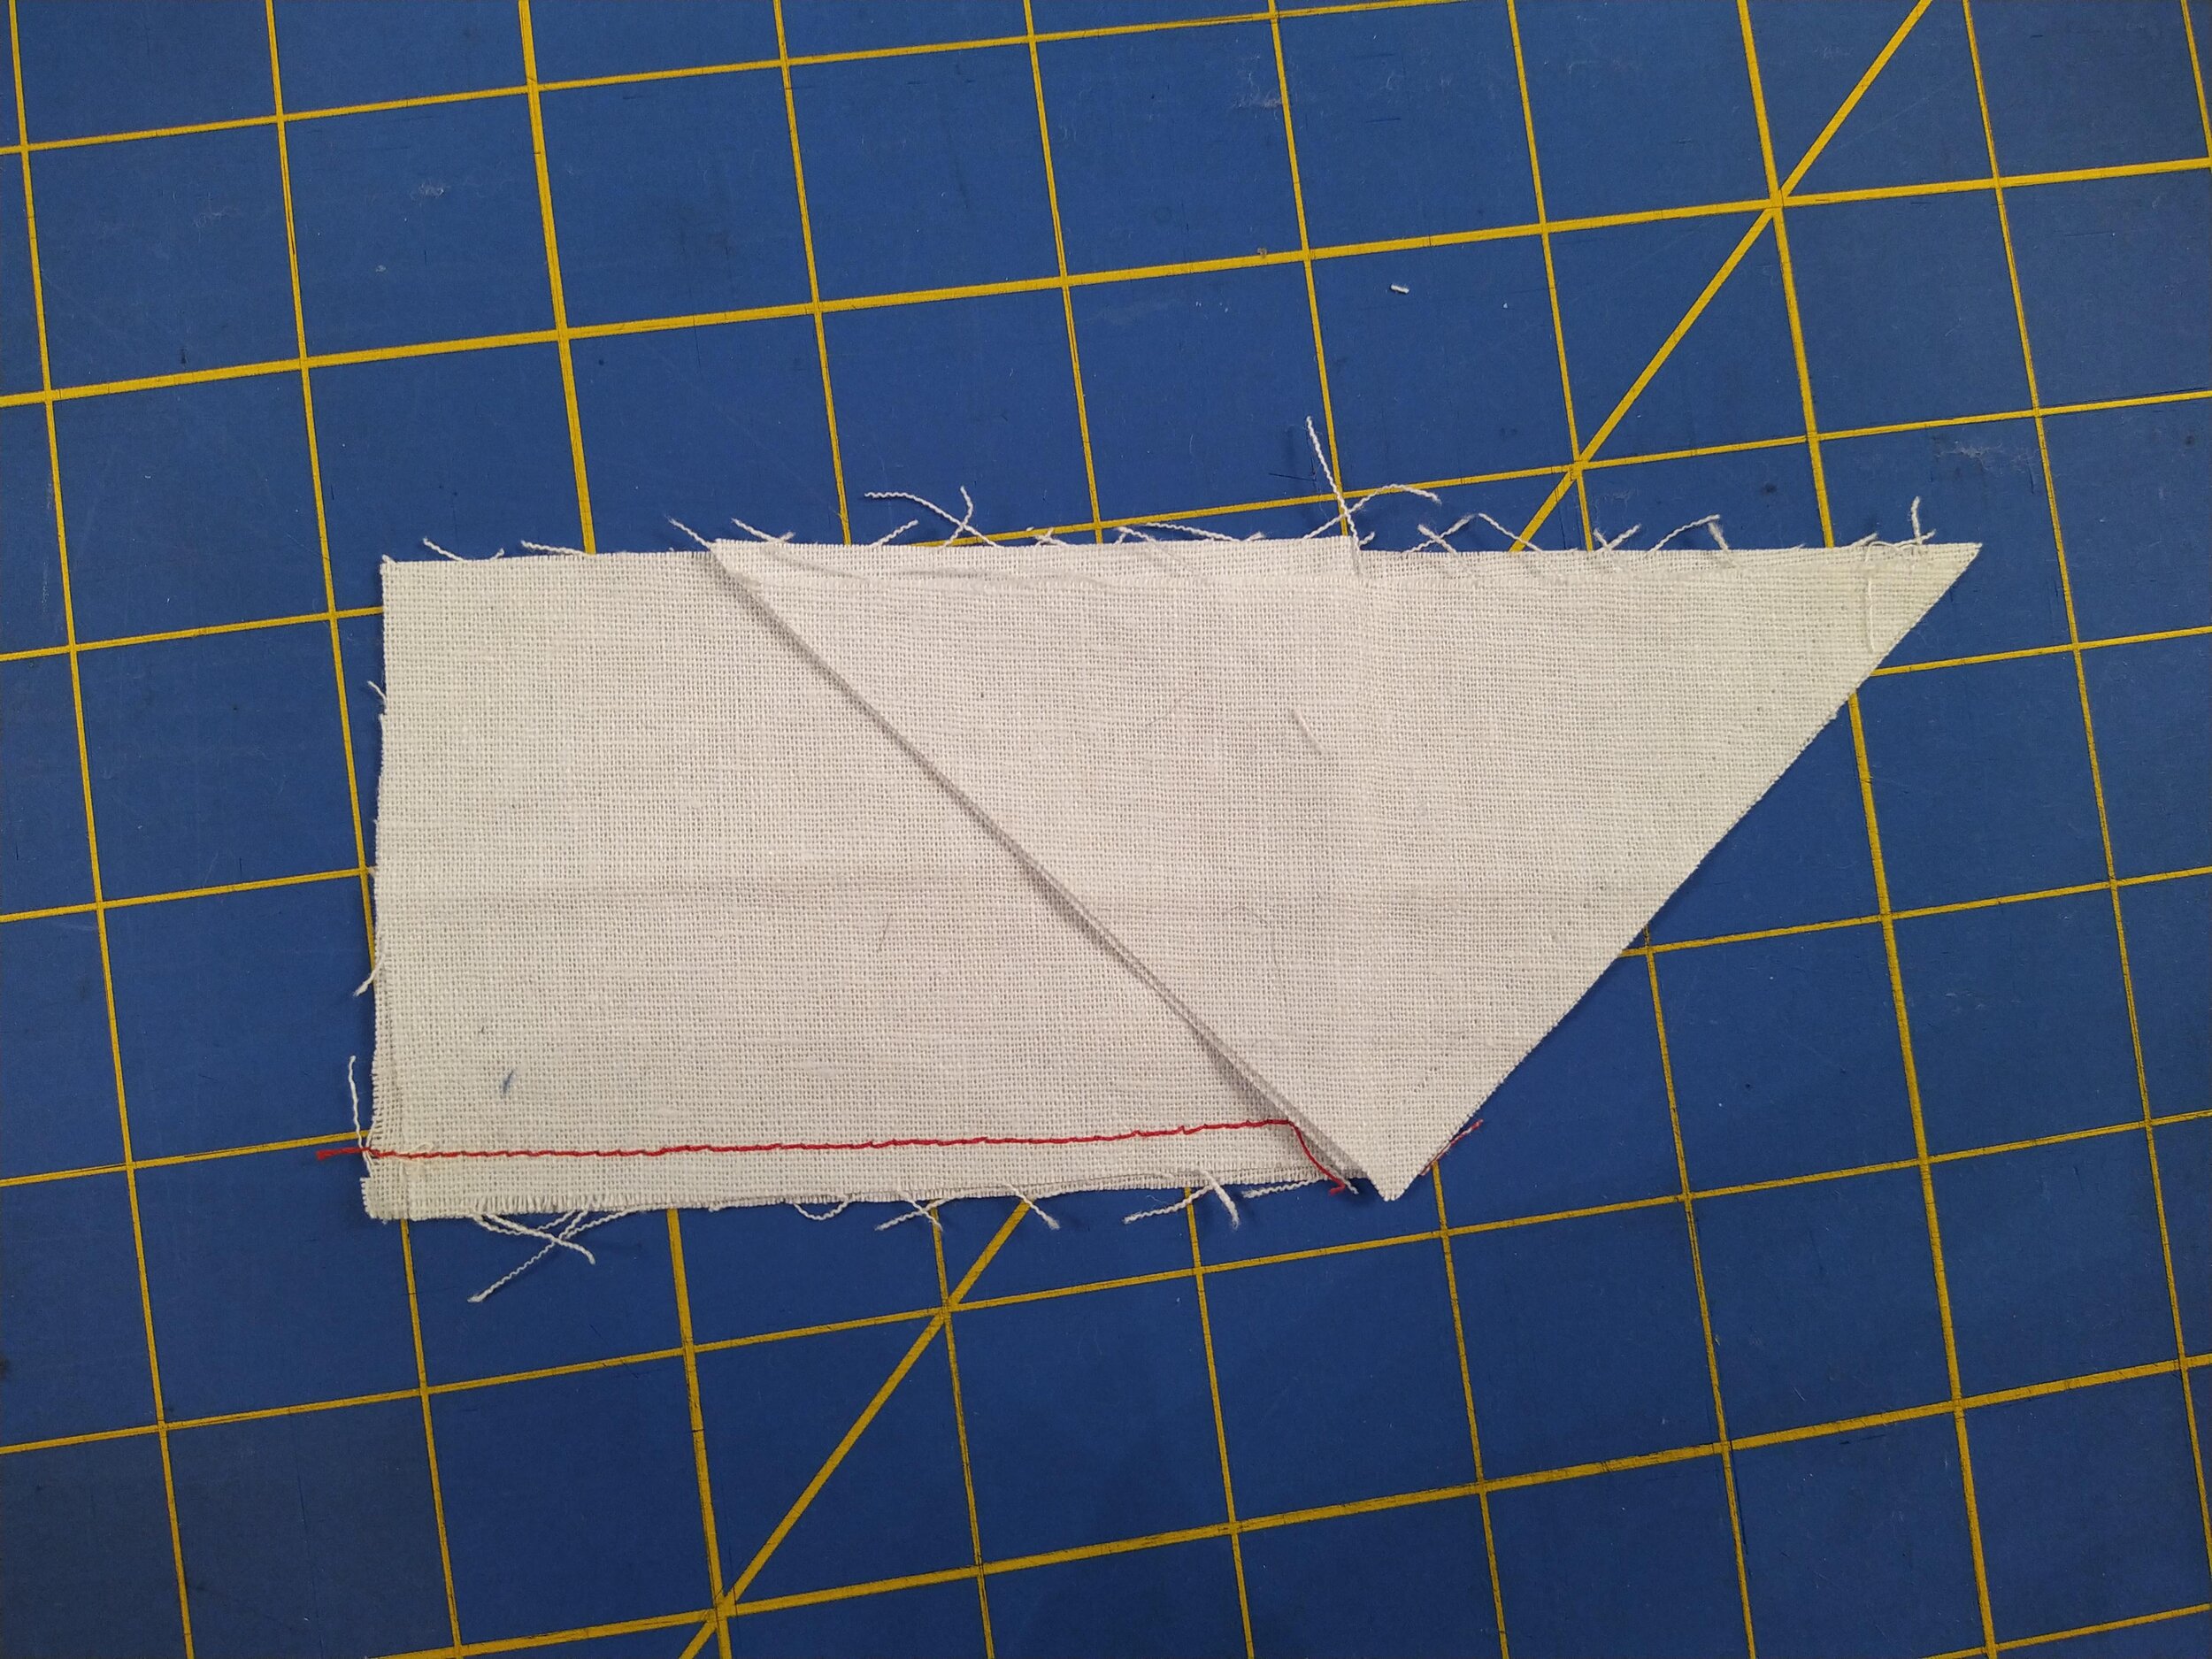
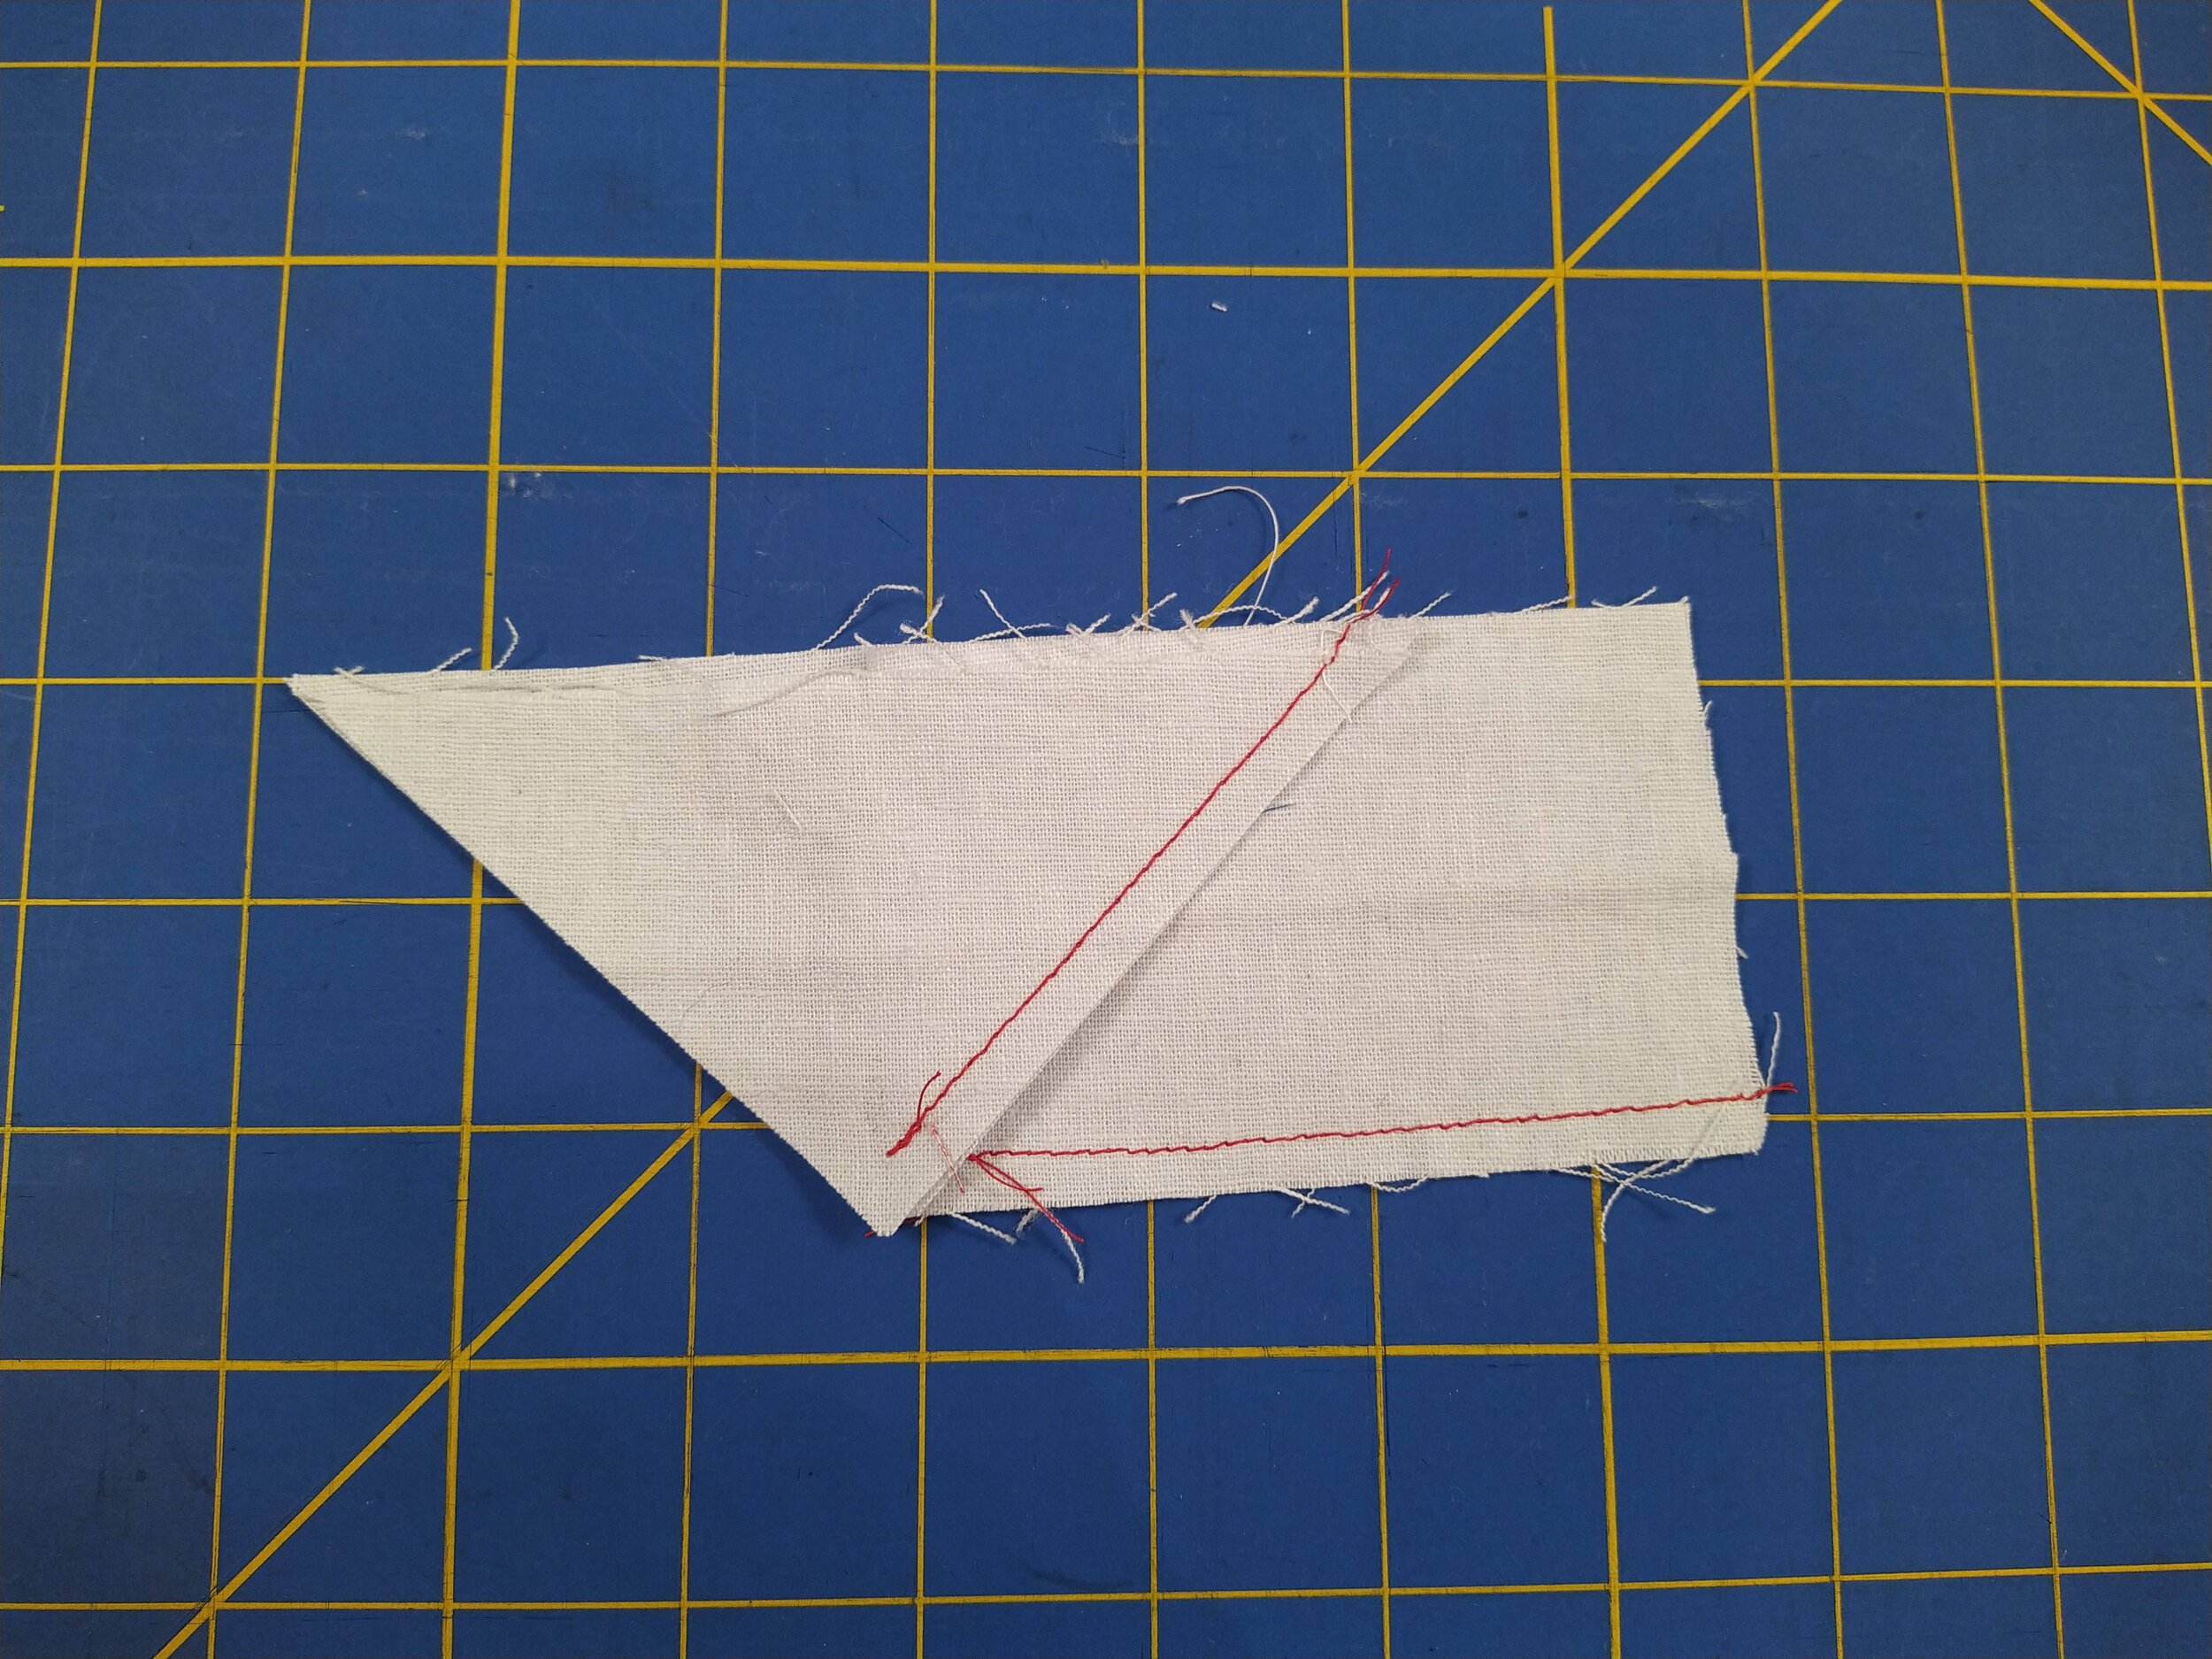
Join the two trapezoidal pieces along the short edge, securing the stitch ¼” from the join of the Y.


2. Arrange the piece such that the seam is closest to you and the pointed tips are to your right. Fold back the top piece of fabric to expose a portion of the bottom trapezoid. The fold should be perpendicular to the edges of the fabric.


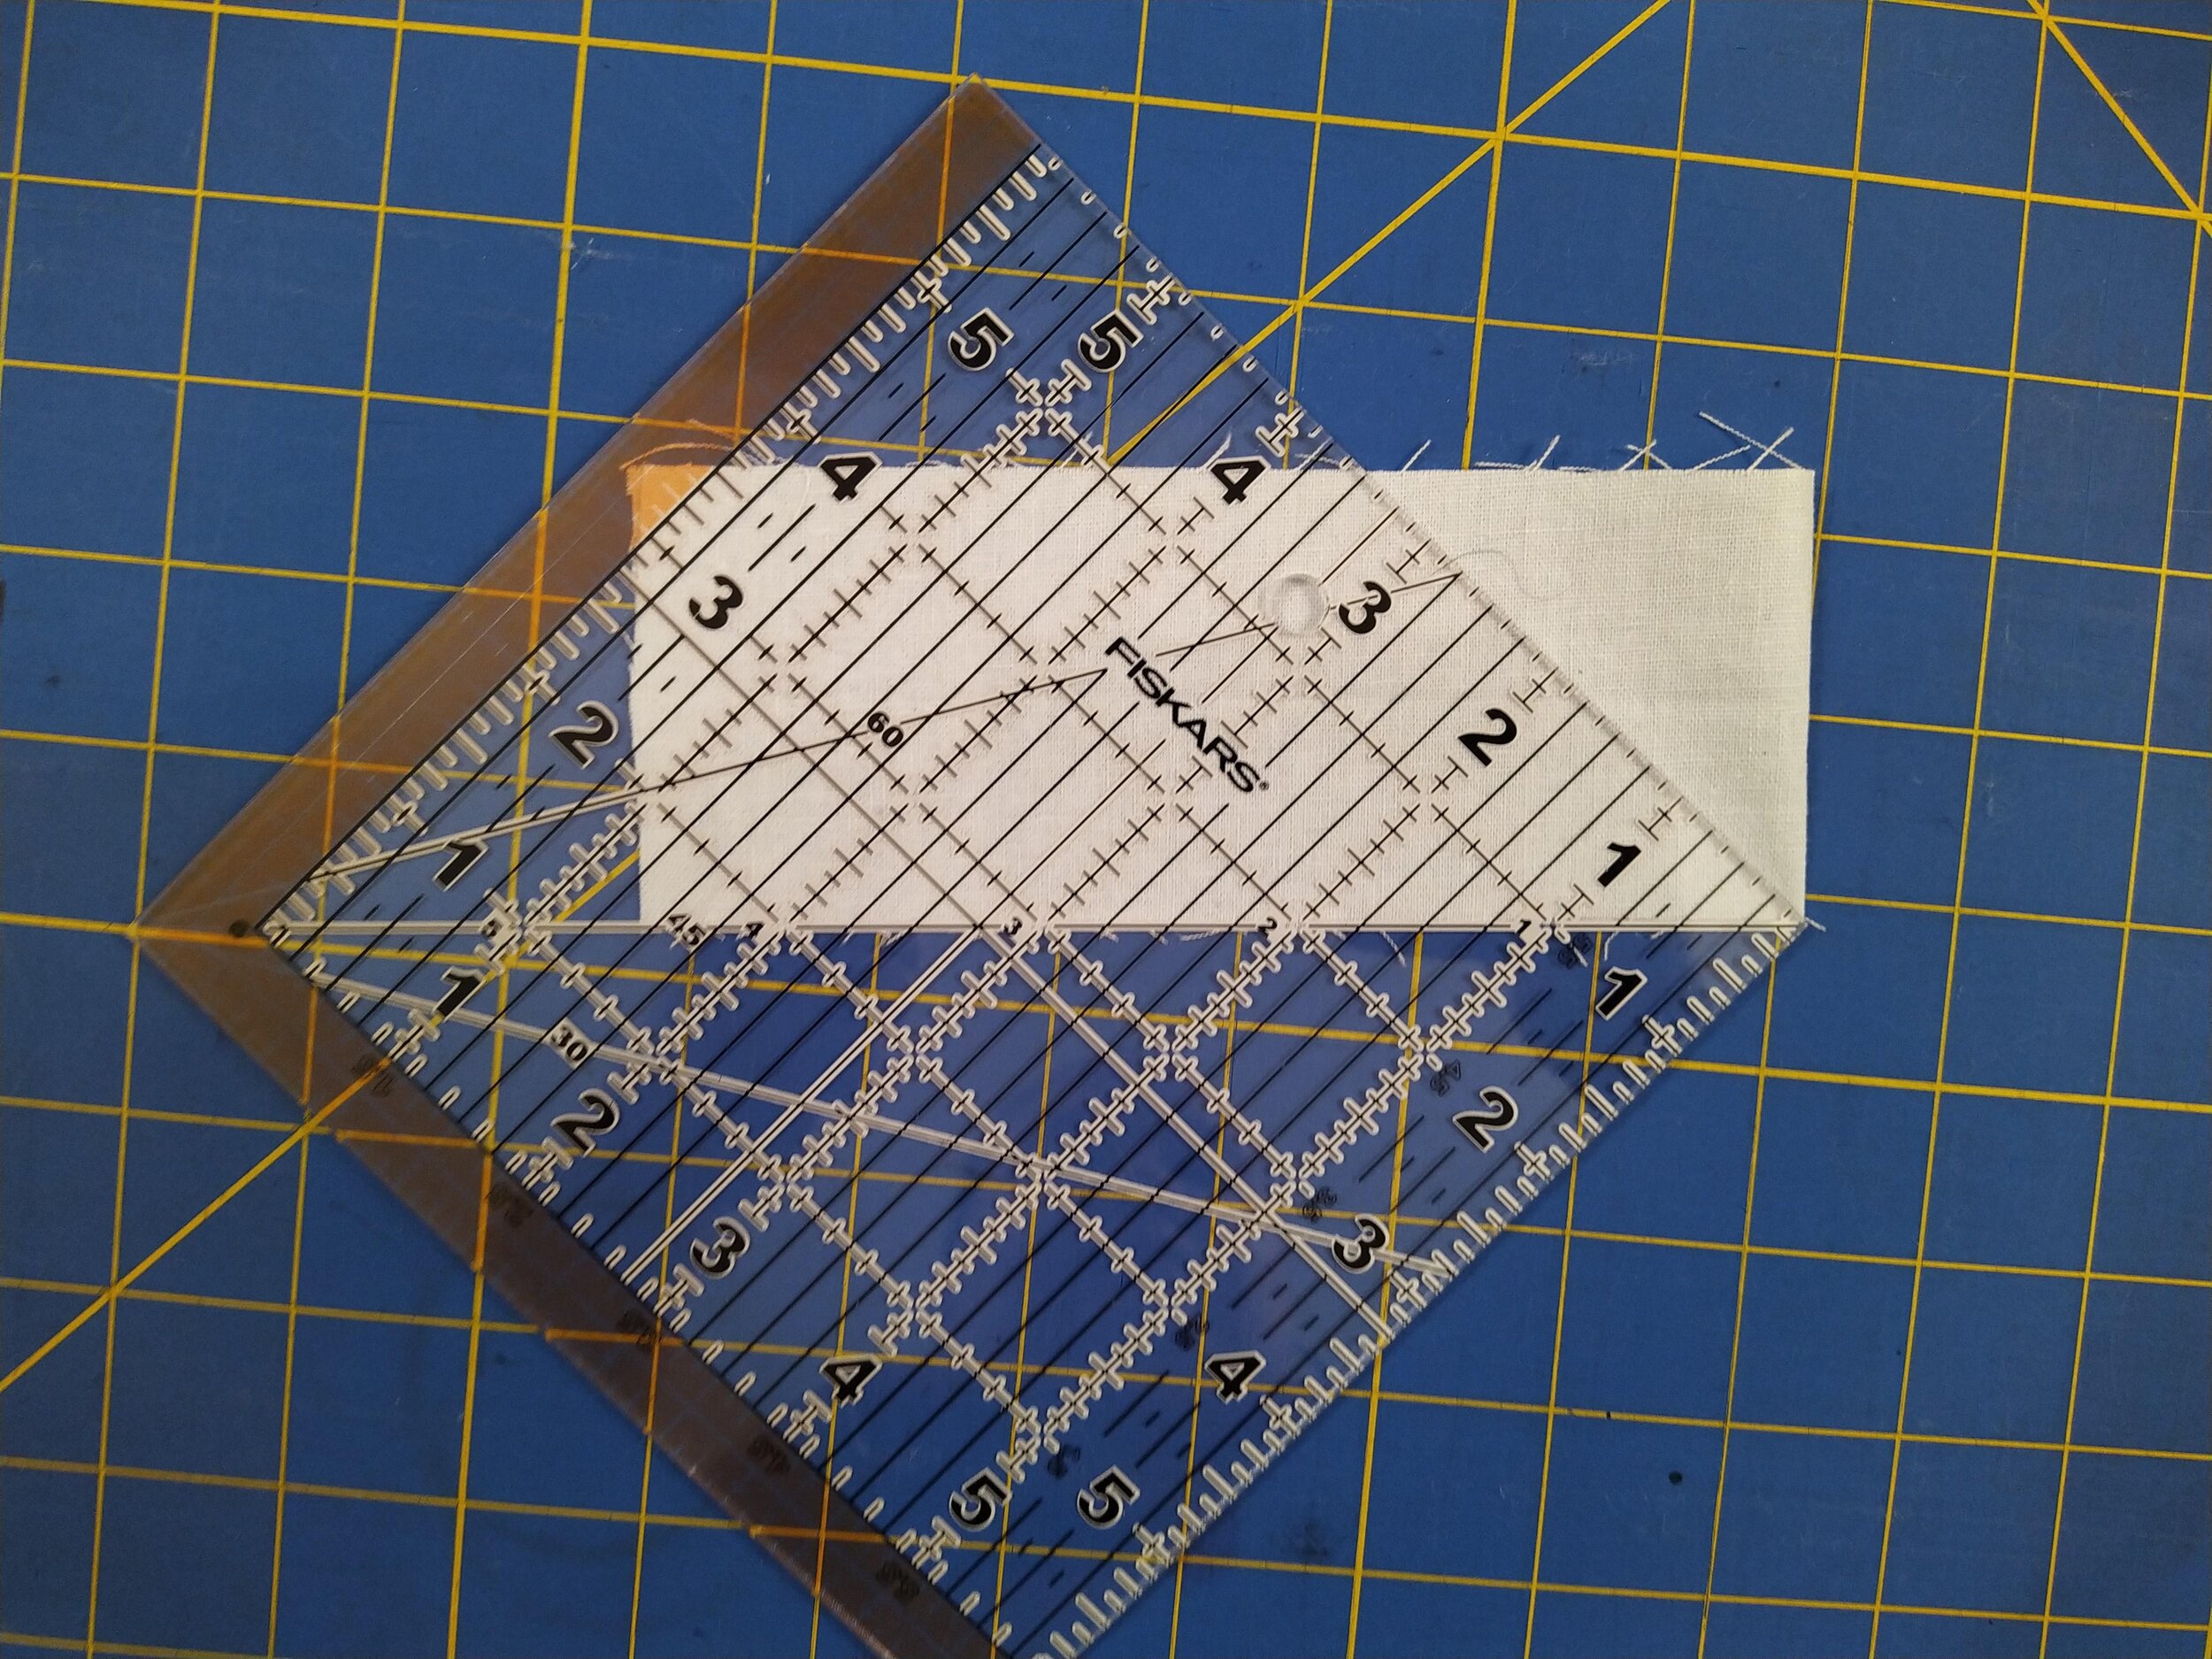
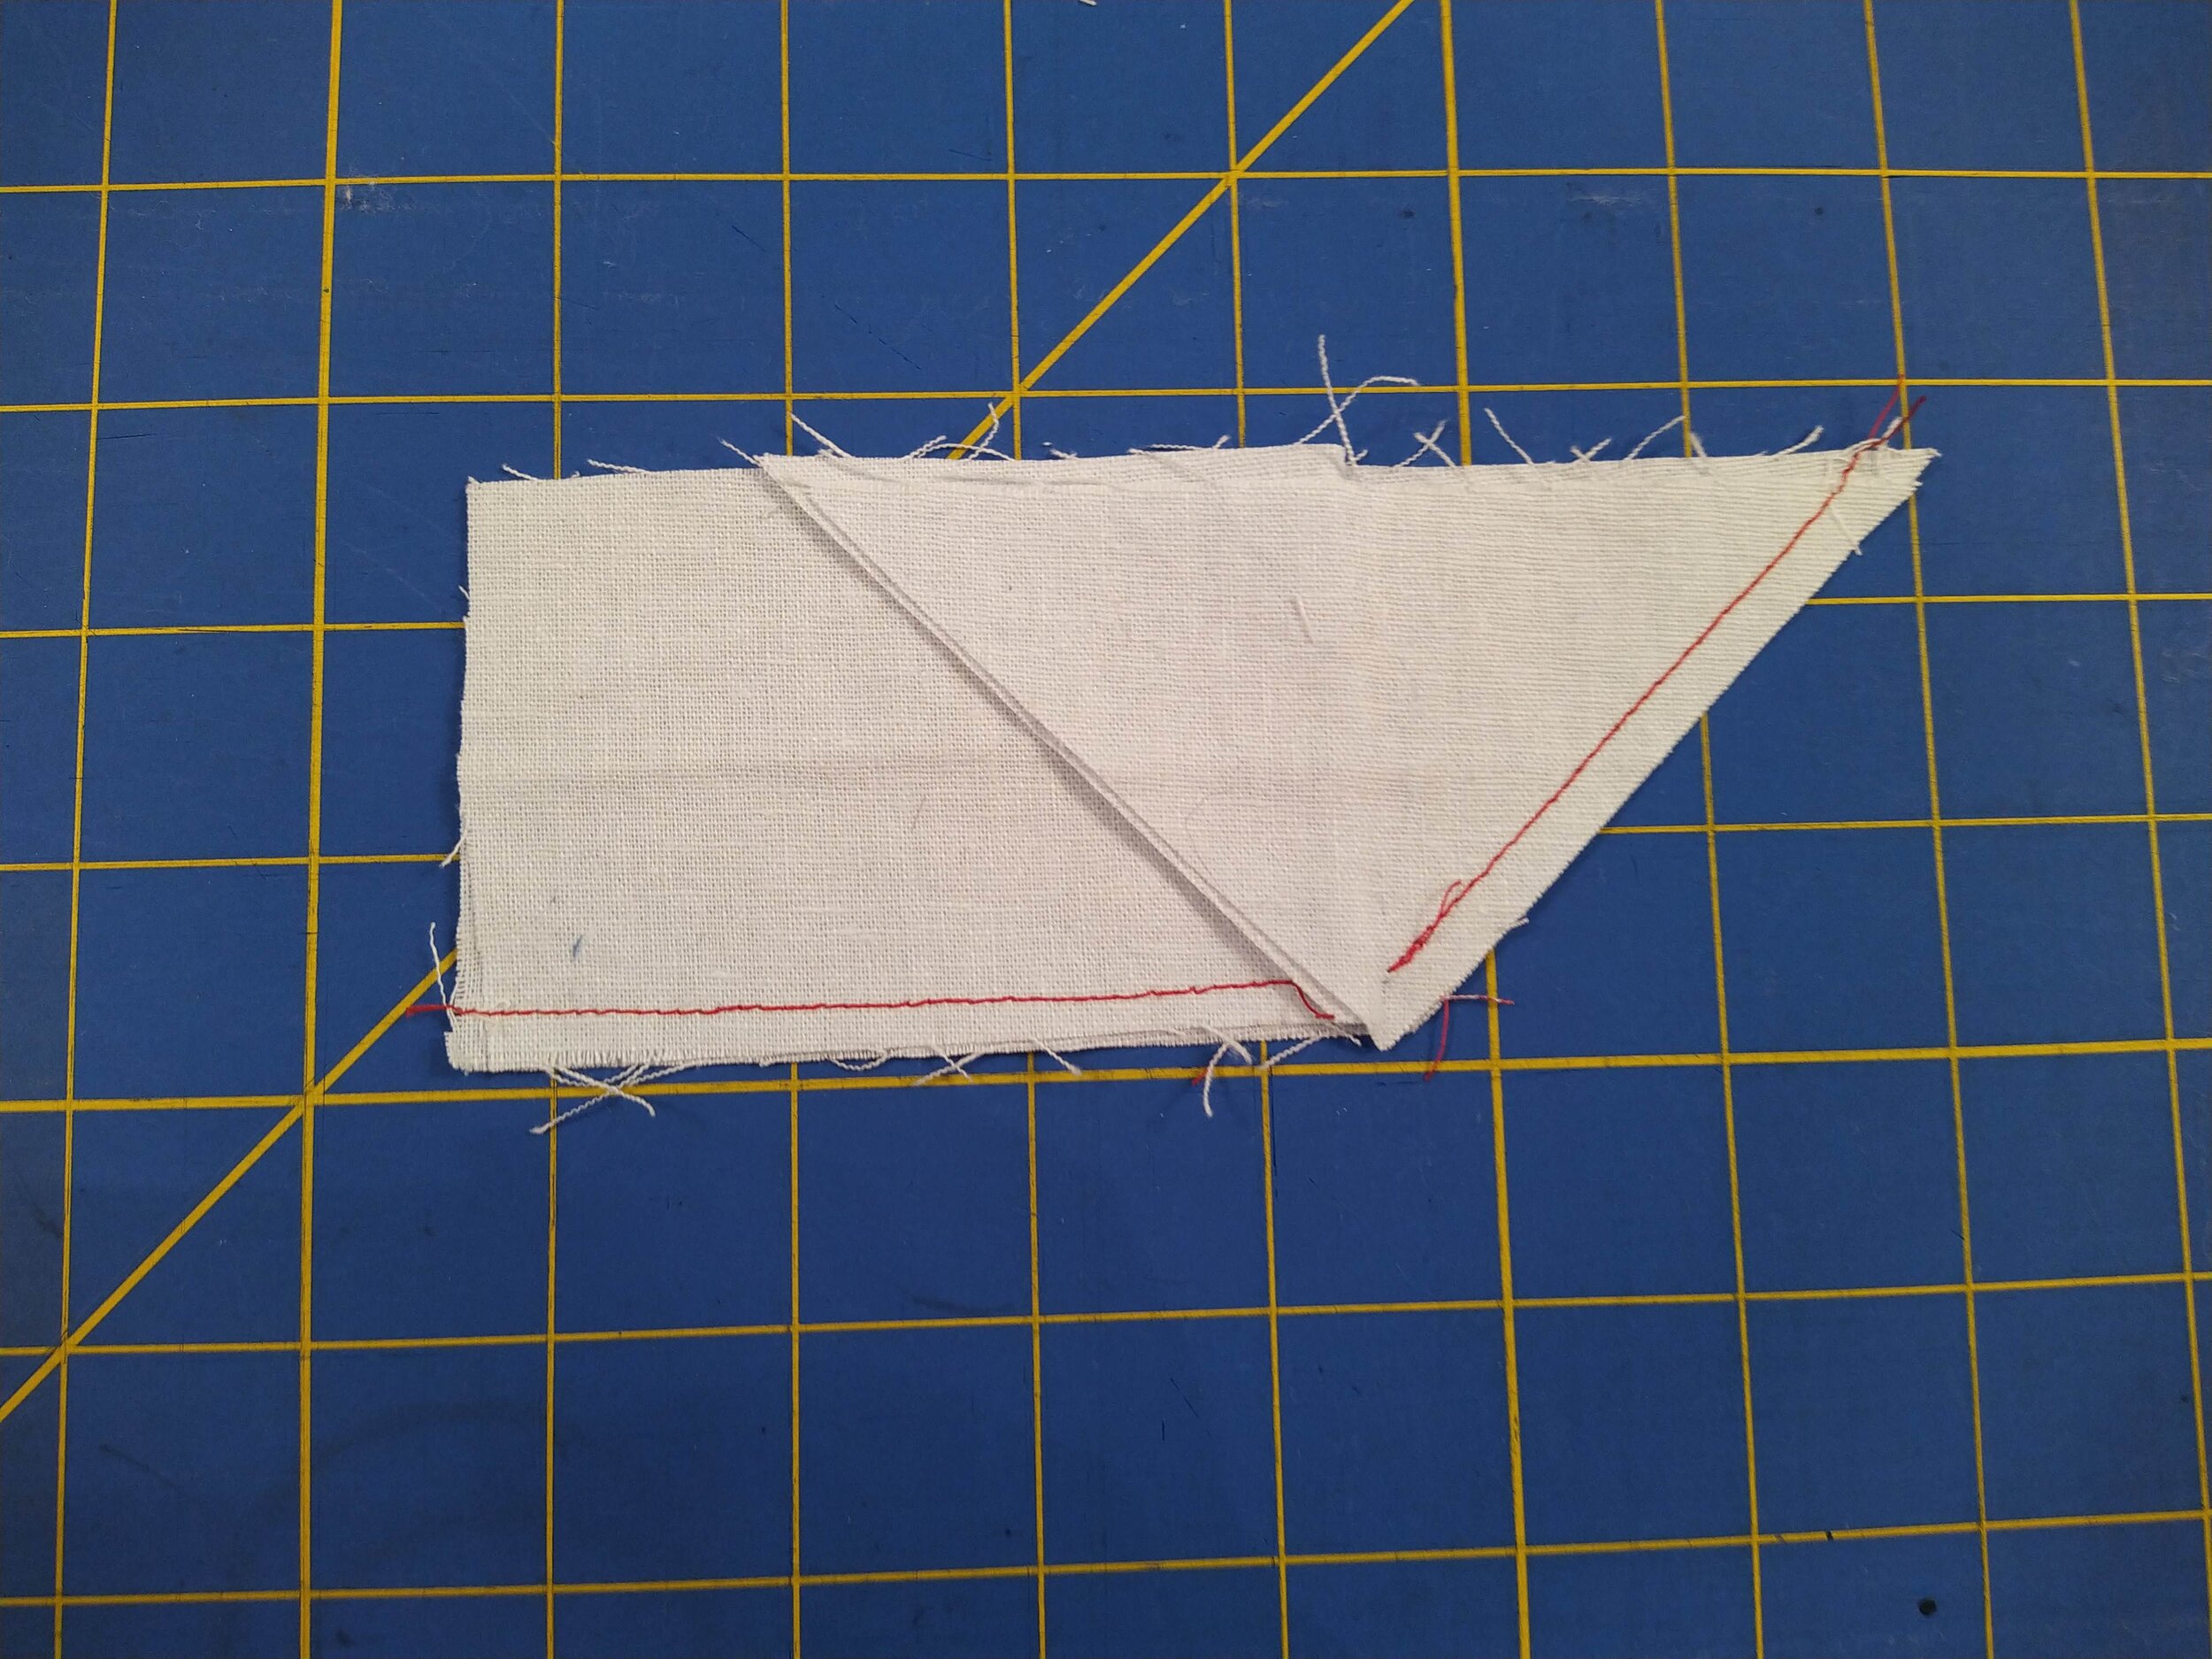
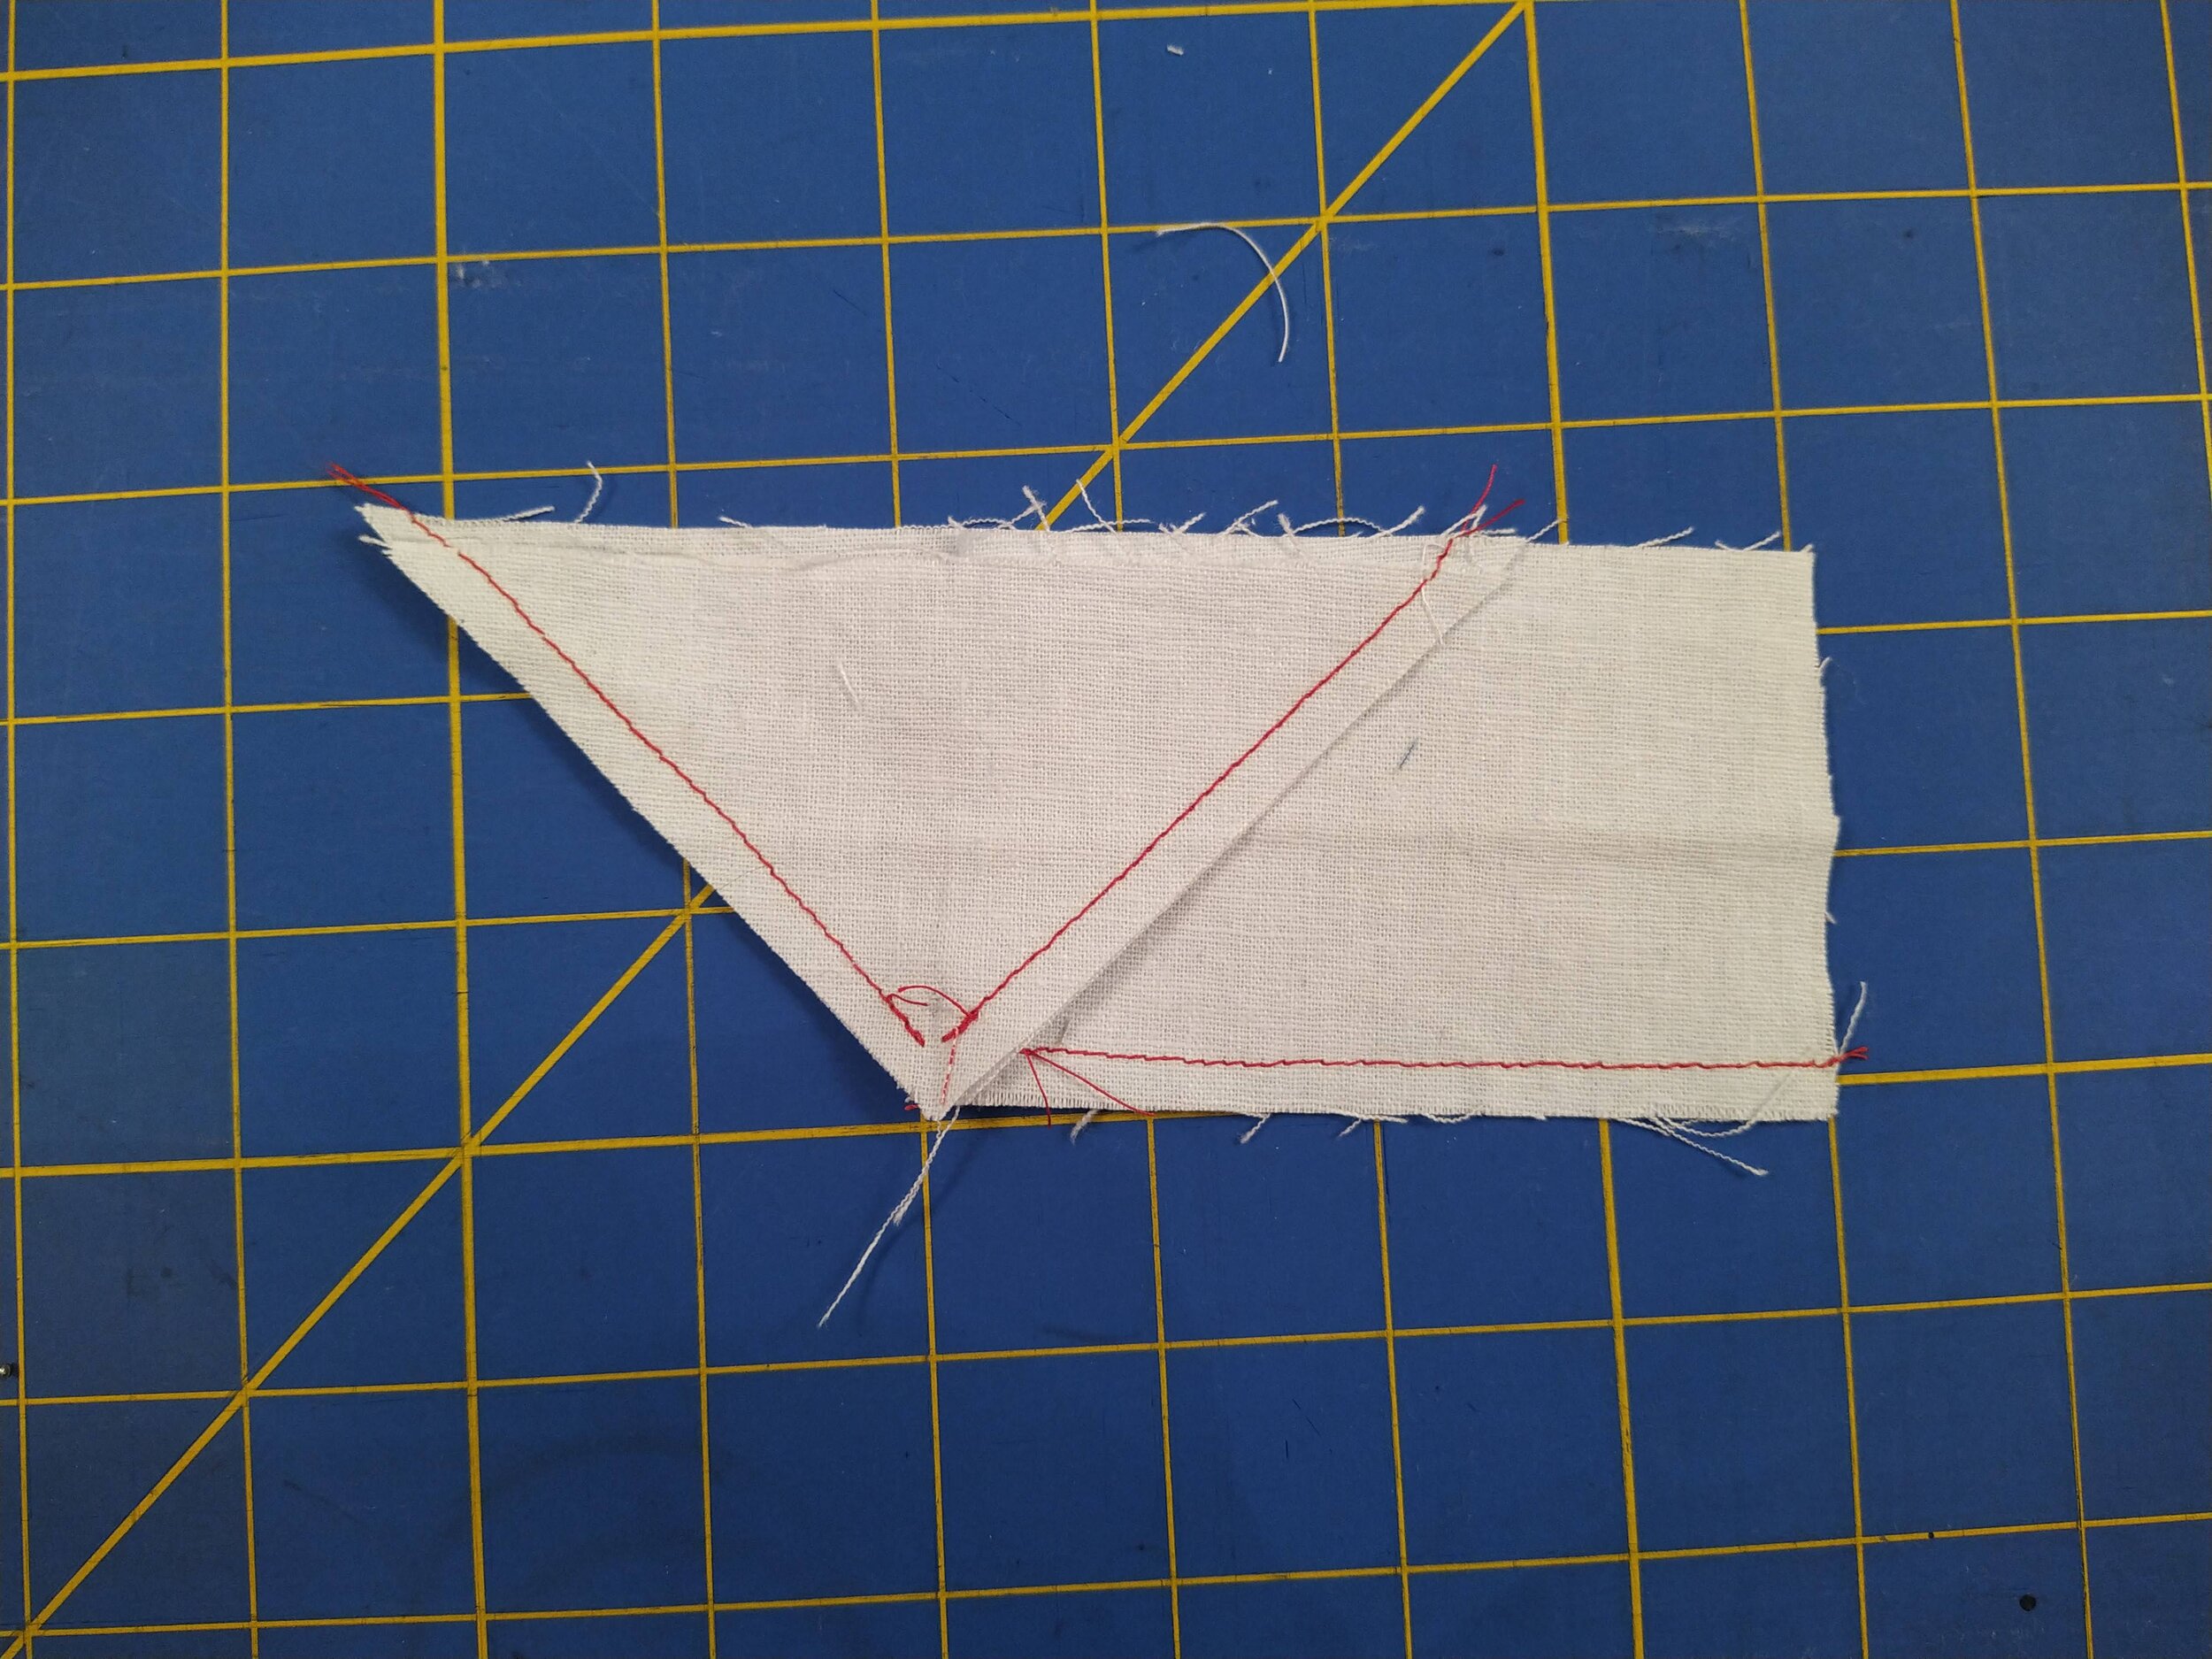
3. Align the triangle piece with the open portion as shown. Pin in place. You are prepared to sew the triangle to the exposed seam. Sew toward the seam joining the two trapezoids, stopping just shy of the fold. Ensure that you are sewing only the triangle to the exposed trapezoid. Secure the stitch and cut the threads.

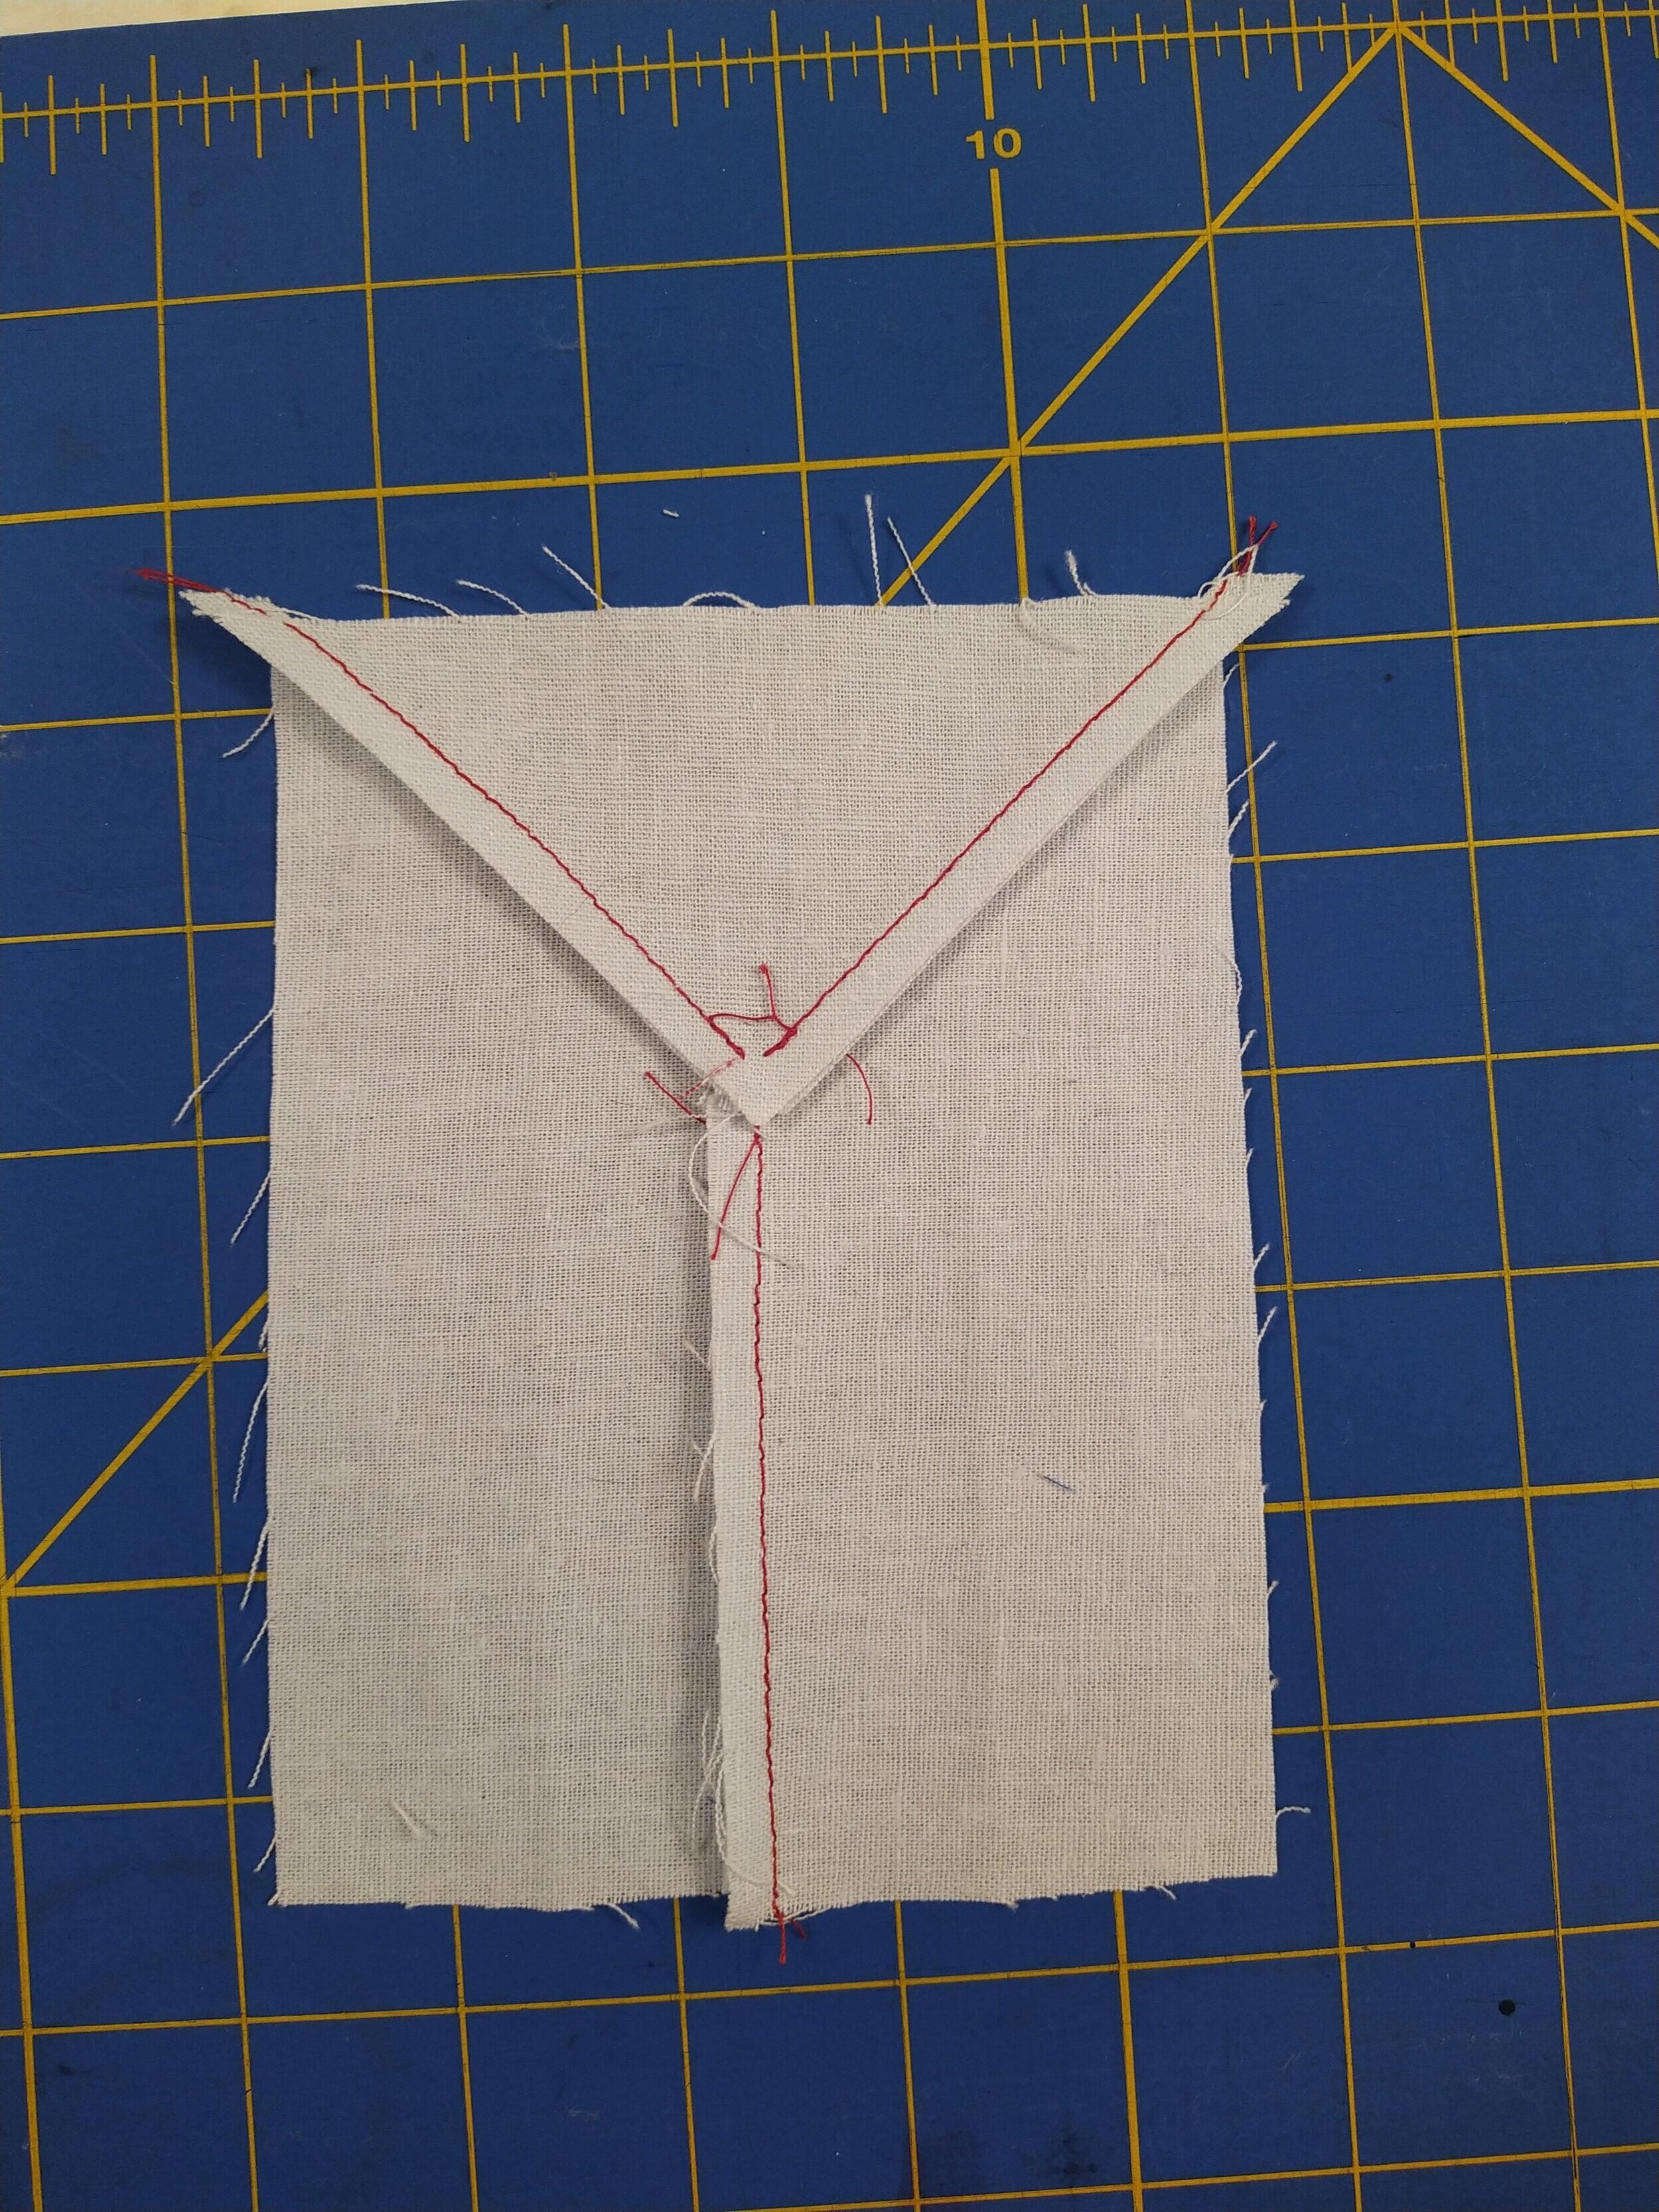
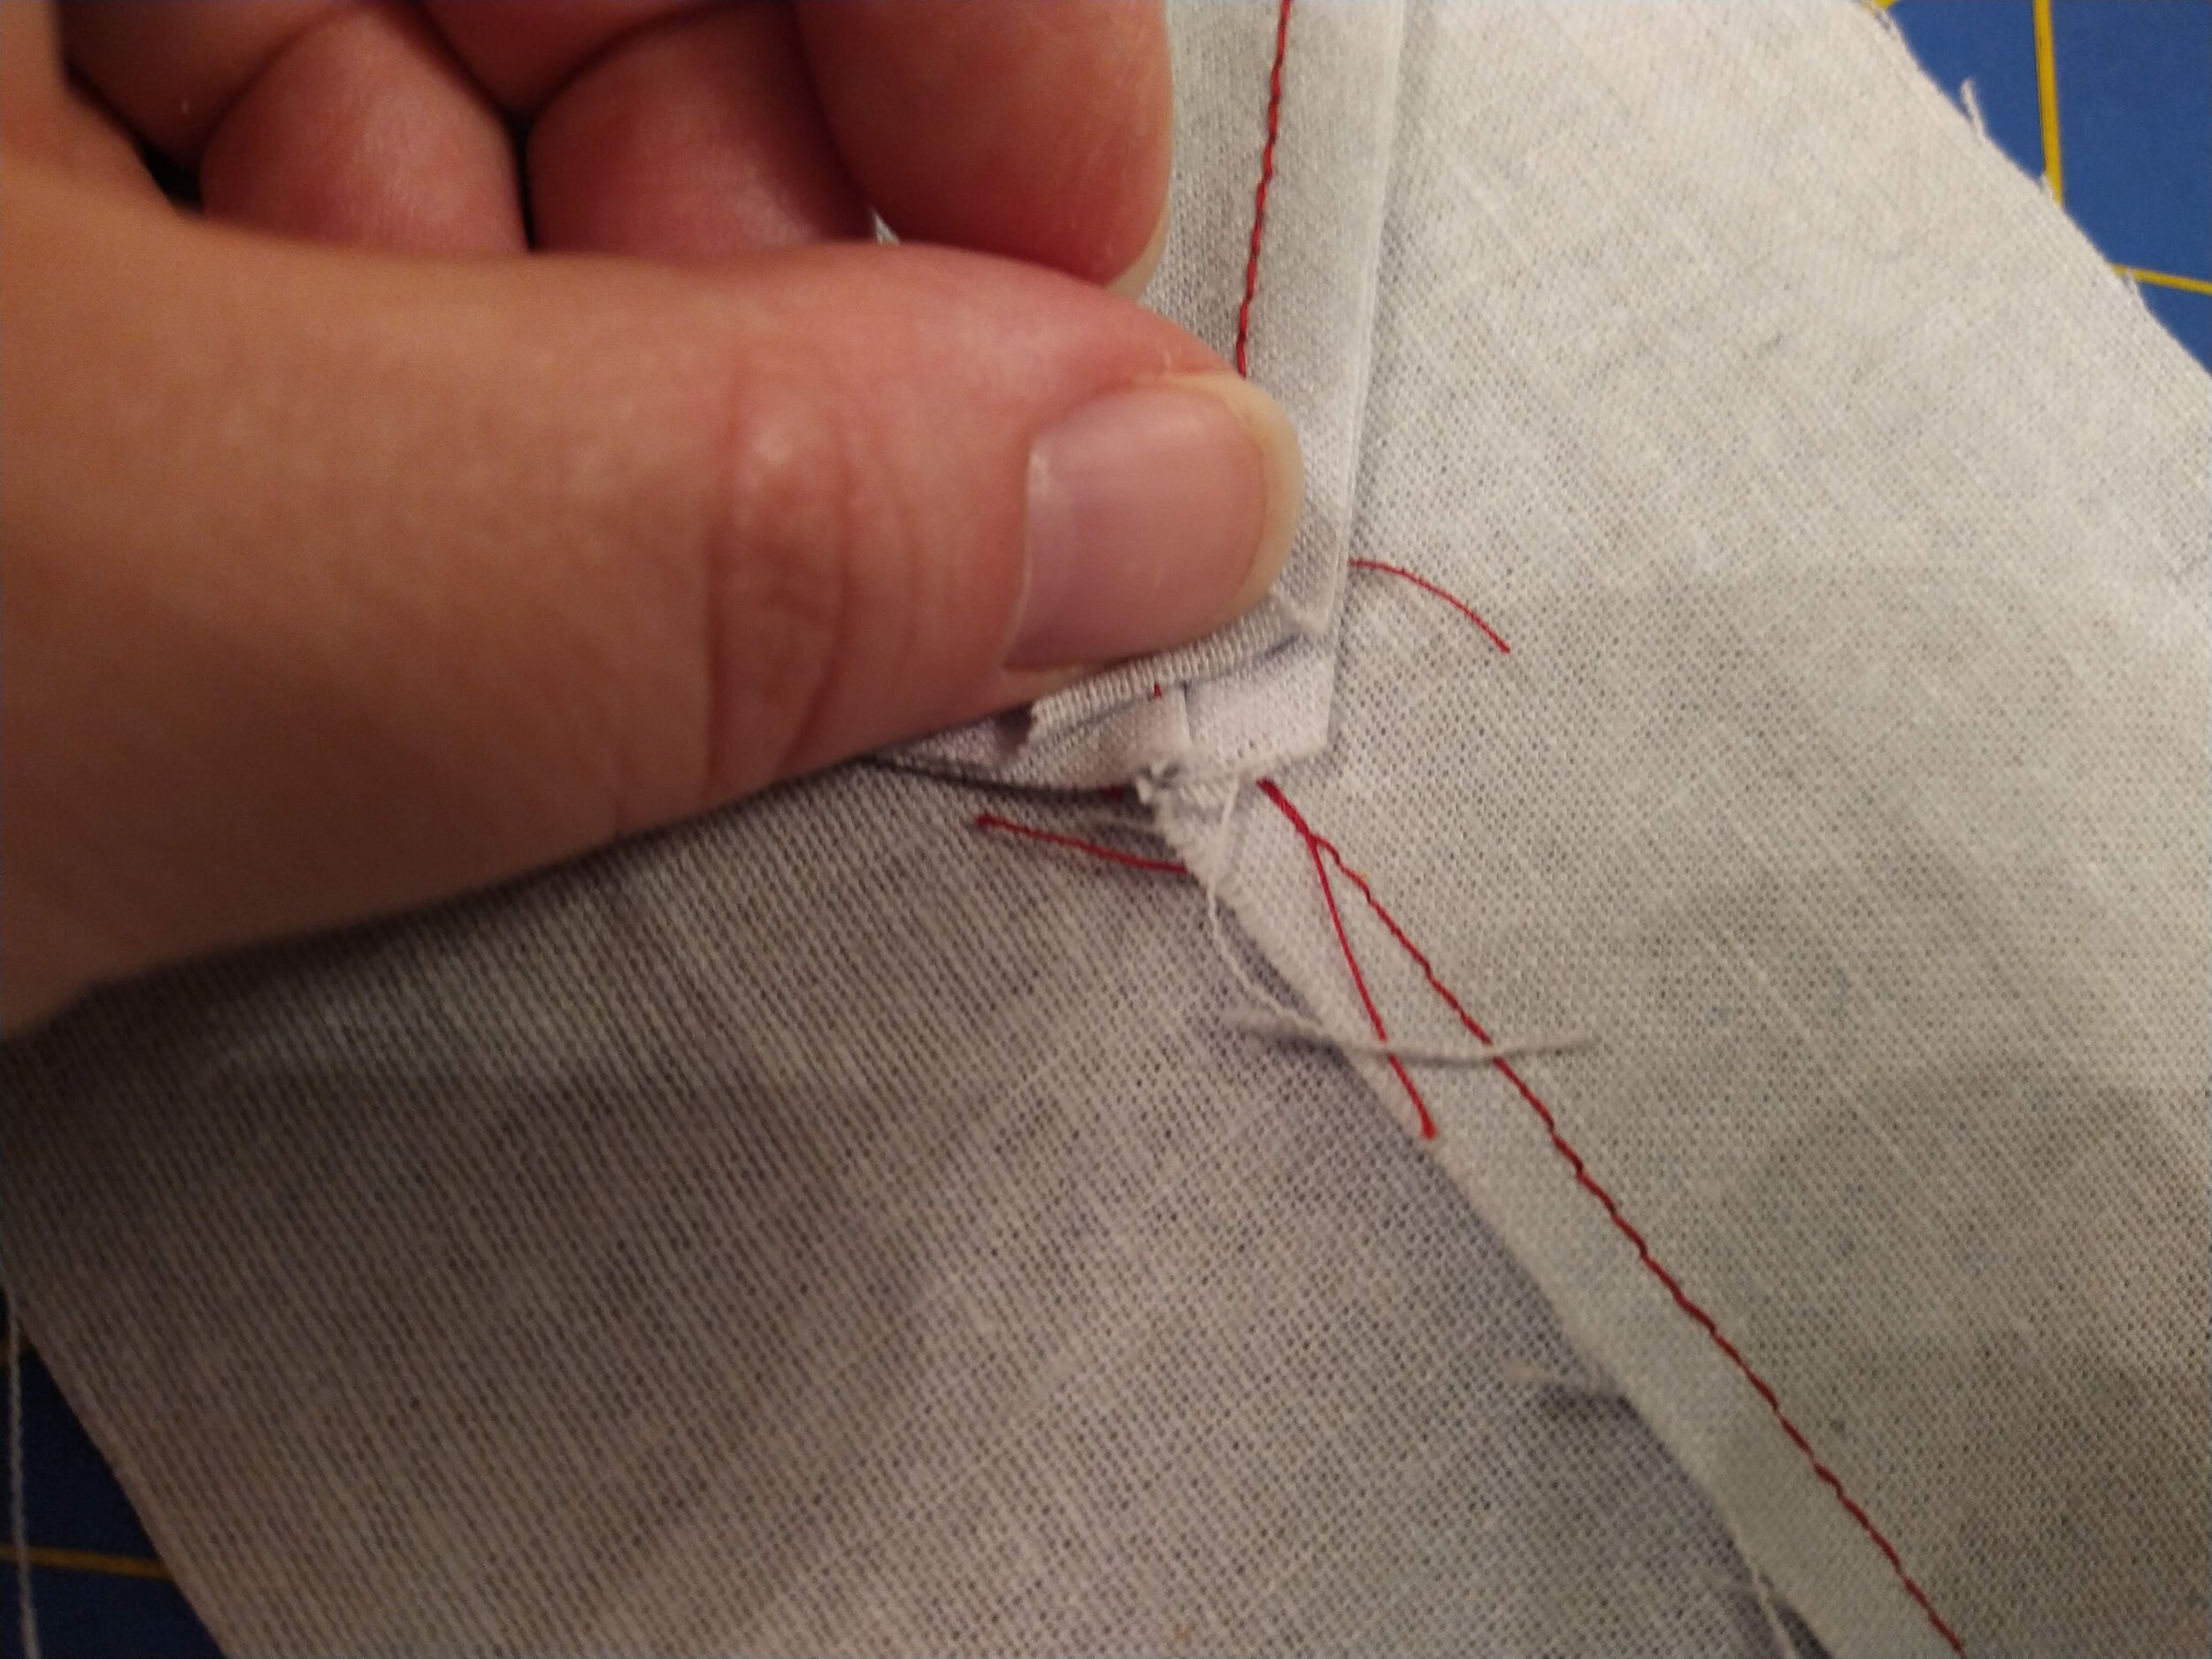
4. Flip the entire unit so that the top trapezoid is in the back. Beginning at the seam you just finished, begin sewing again by securing the stitch and sewing along the edge.

5. Open up the work and press seams away from the triangle.


Leave a comment